Overview
This document describes how to integrate ThreatSTOP’s IP Defense with a Netgate pfSense device:
- Automatic & persistent configuration via web portal. You set policy & integration configuration on our admin portal, then the settings automatically propagate on the device. Think of this as unified central management across device brands, makes and models.
- Automated retrieval and updates of IP Defense policies
- Automated collection and upload of log files
Compatibility
| Manufacturer | Version | Supported |
|---|---|---|
| Netgate | 2.5 | Yes † |
| Netgate | 2.6 | Yes † |
| Netgate | 2.7.0 | Yes |
| Netgate | 2.7.1 | Yes |
| Netgate | 2.7.2 | Yes |
| Netgate | 2.8.0 | Yes |
| Netgate | 2.8.1 | Yes |
- † - Netgate has deprecated some of the package repositories used by previous versions of pfSense. This package requires packages (sudo, stunnel) to function properly.
Upgrades
Netgate recommends removing packages before doing upgrades and re-installing after the upgrade is complete. We have tested inplace upgrades and concur with that assessment.
Current Version
| Current Version | Released |
|---|---|
| 2.07-01 | Aug 20th, 2025 |
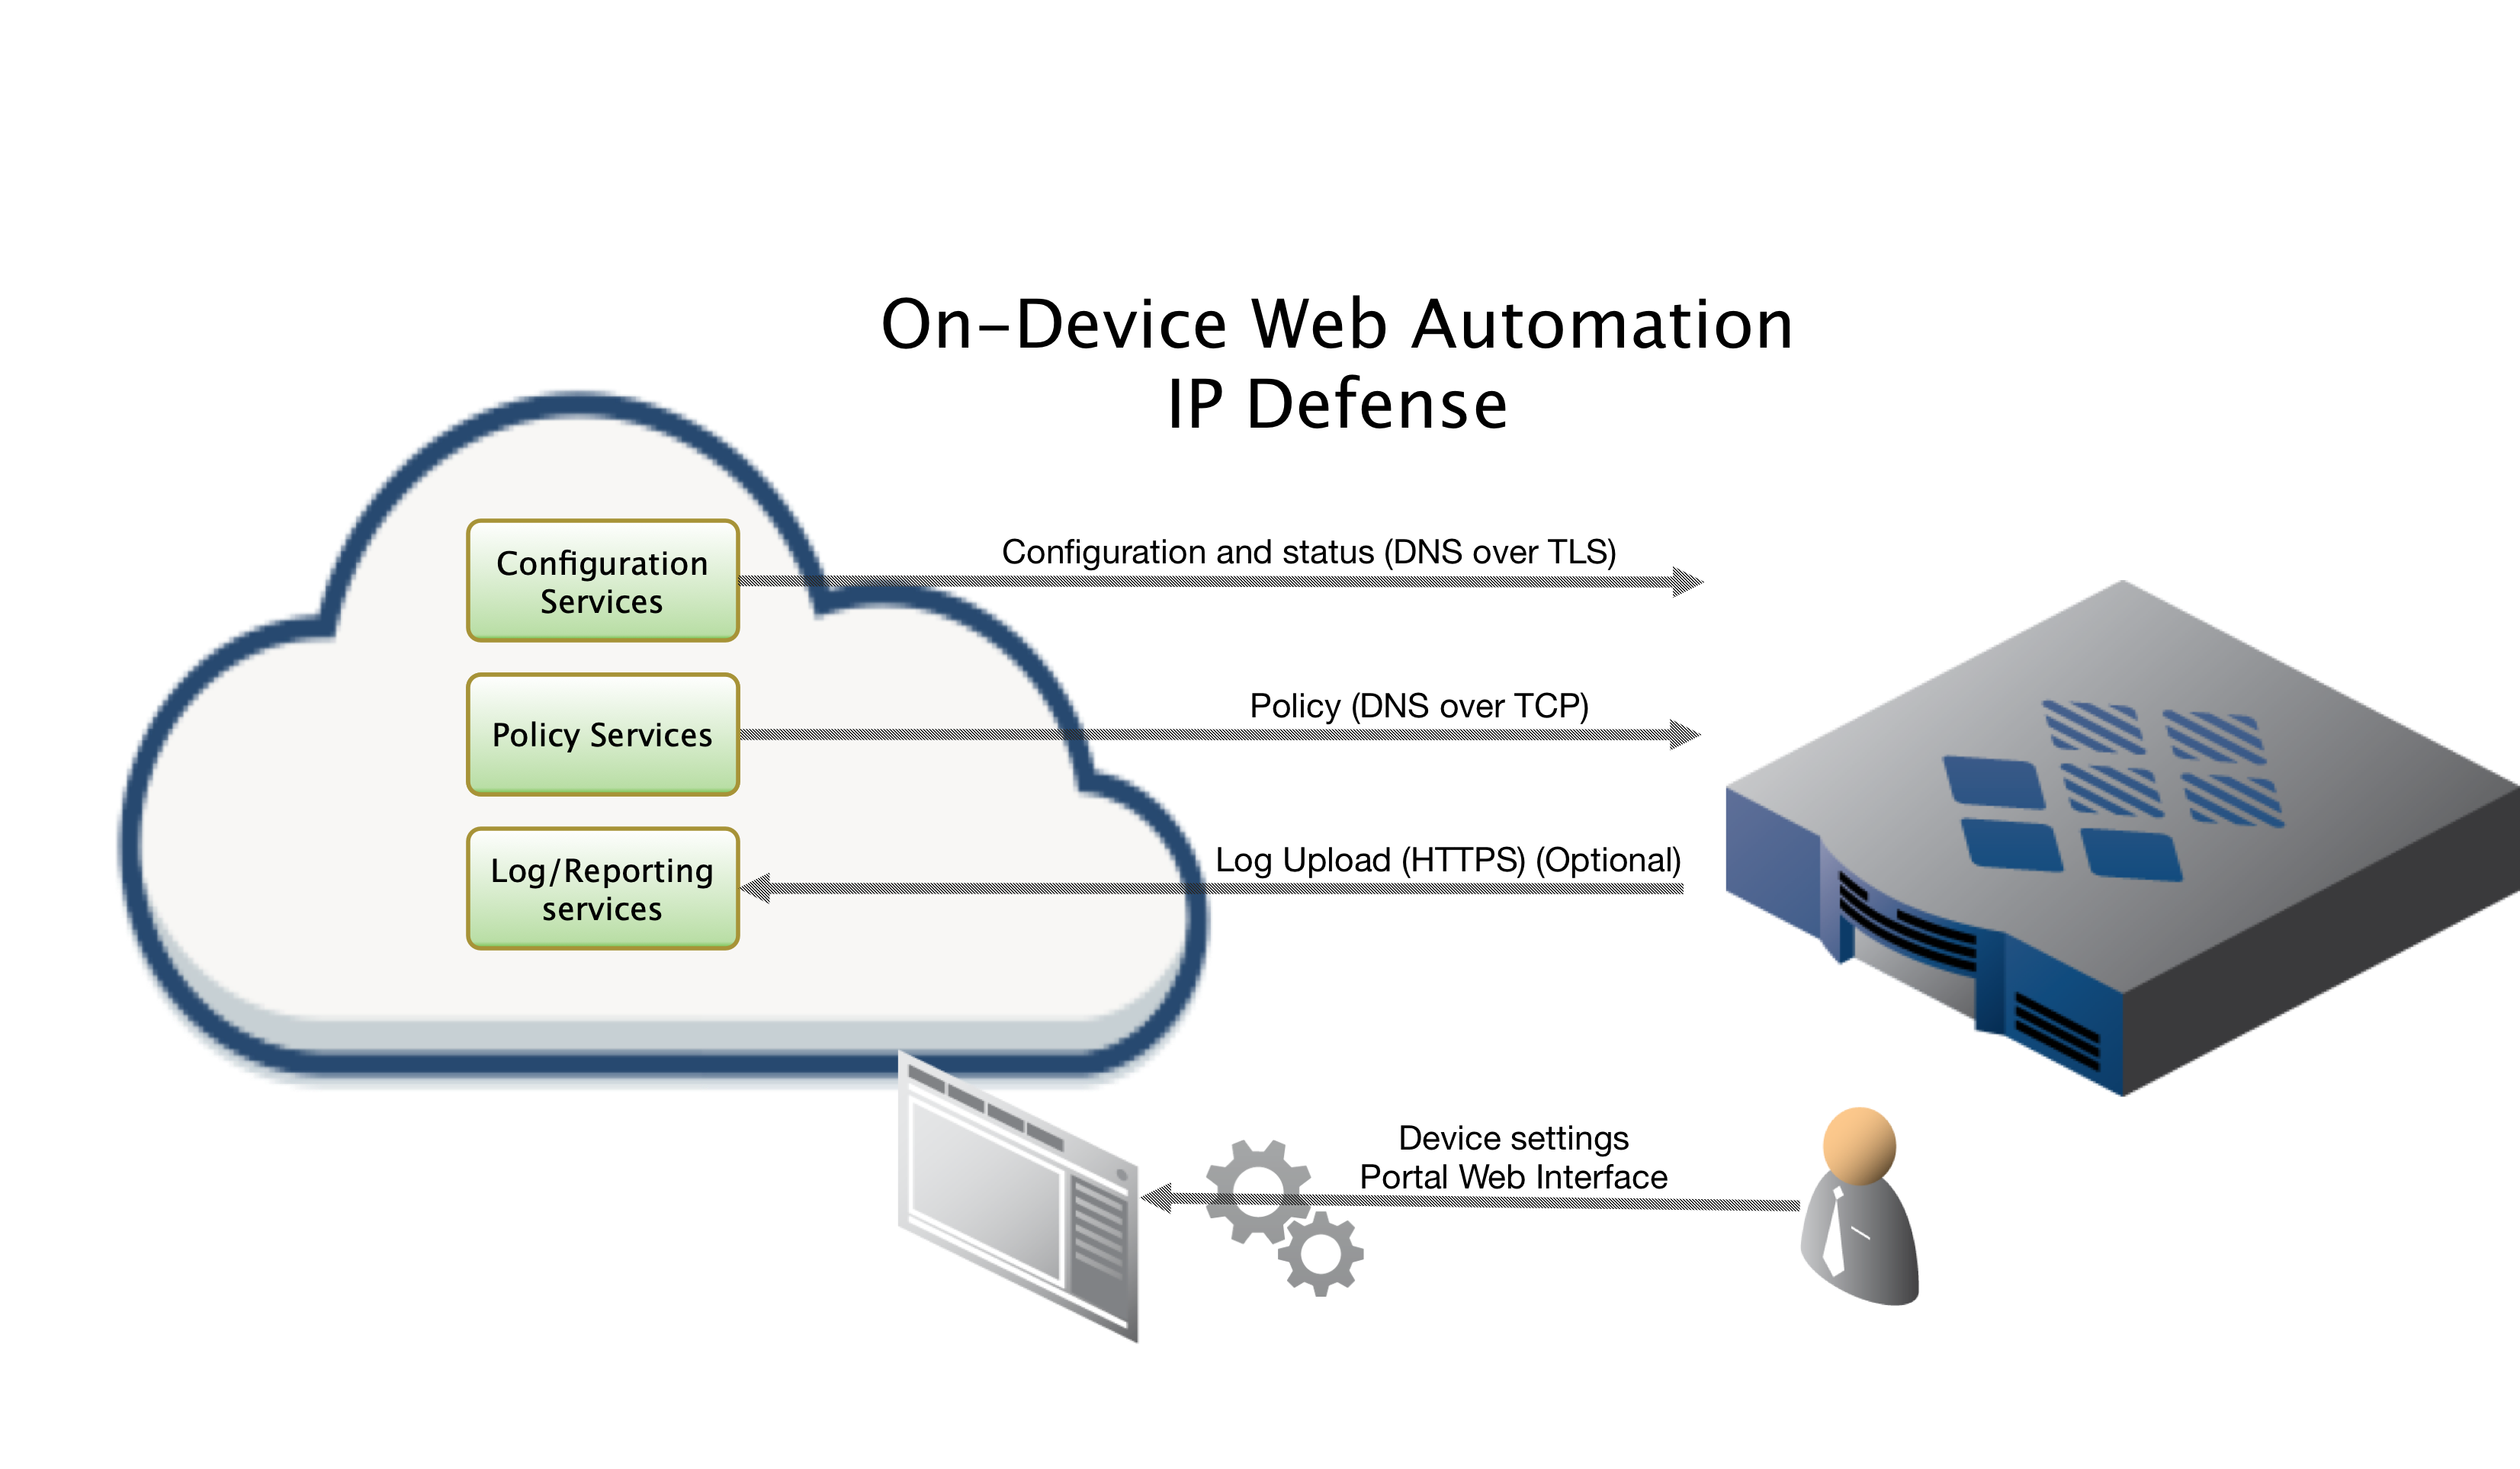
ThreatSTOP Data Flow Diagram
Install Methods
On Device CLI Install
Installing On-Device via SSH CLI, which is covered here.
On Device Install via Web Automation
Installing directly on your device via Web Automation, which allows you to configure settings on our web interface and have them automatically update on the device after initial installation. This method will require you to run an initial abbreviated command on the device to link up to our services. From that point forward your device will stay in sync with configuration updates you make on the portal. For more information regarding Web Automation click here.
Quick settings
Quick settings are provided below for expert installers who have already read through the documentation and understand what they are doing.
curl -o ./ts-pfsense-2.07-01.pkg -sO https://downloads.threatstop.com/pub/ts-pfsense.pkg && pkg install ./ts-pfsense-2.07-01.pkg && rehash
# Due to recent changes in the default sudoers file you may need to switch to the threatstop service account to perform the following commands.
su - threatstop
# to verify you are now the threatstop user run id
$ id
uid=1501(threatstop) gid=1501(threatstop) groups=1501(threatstop)
# now run the tsadmin add --type auto command directly below
$ tsadmin add --type auto --device_id=[Device ID] --auto_key=[Device Key] **WARNING - THIS IS NOT A VALID COMPLETE COMMAND**
Installation considerations
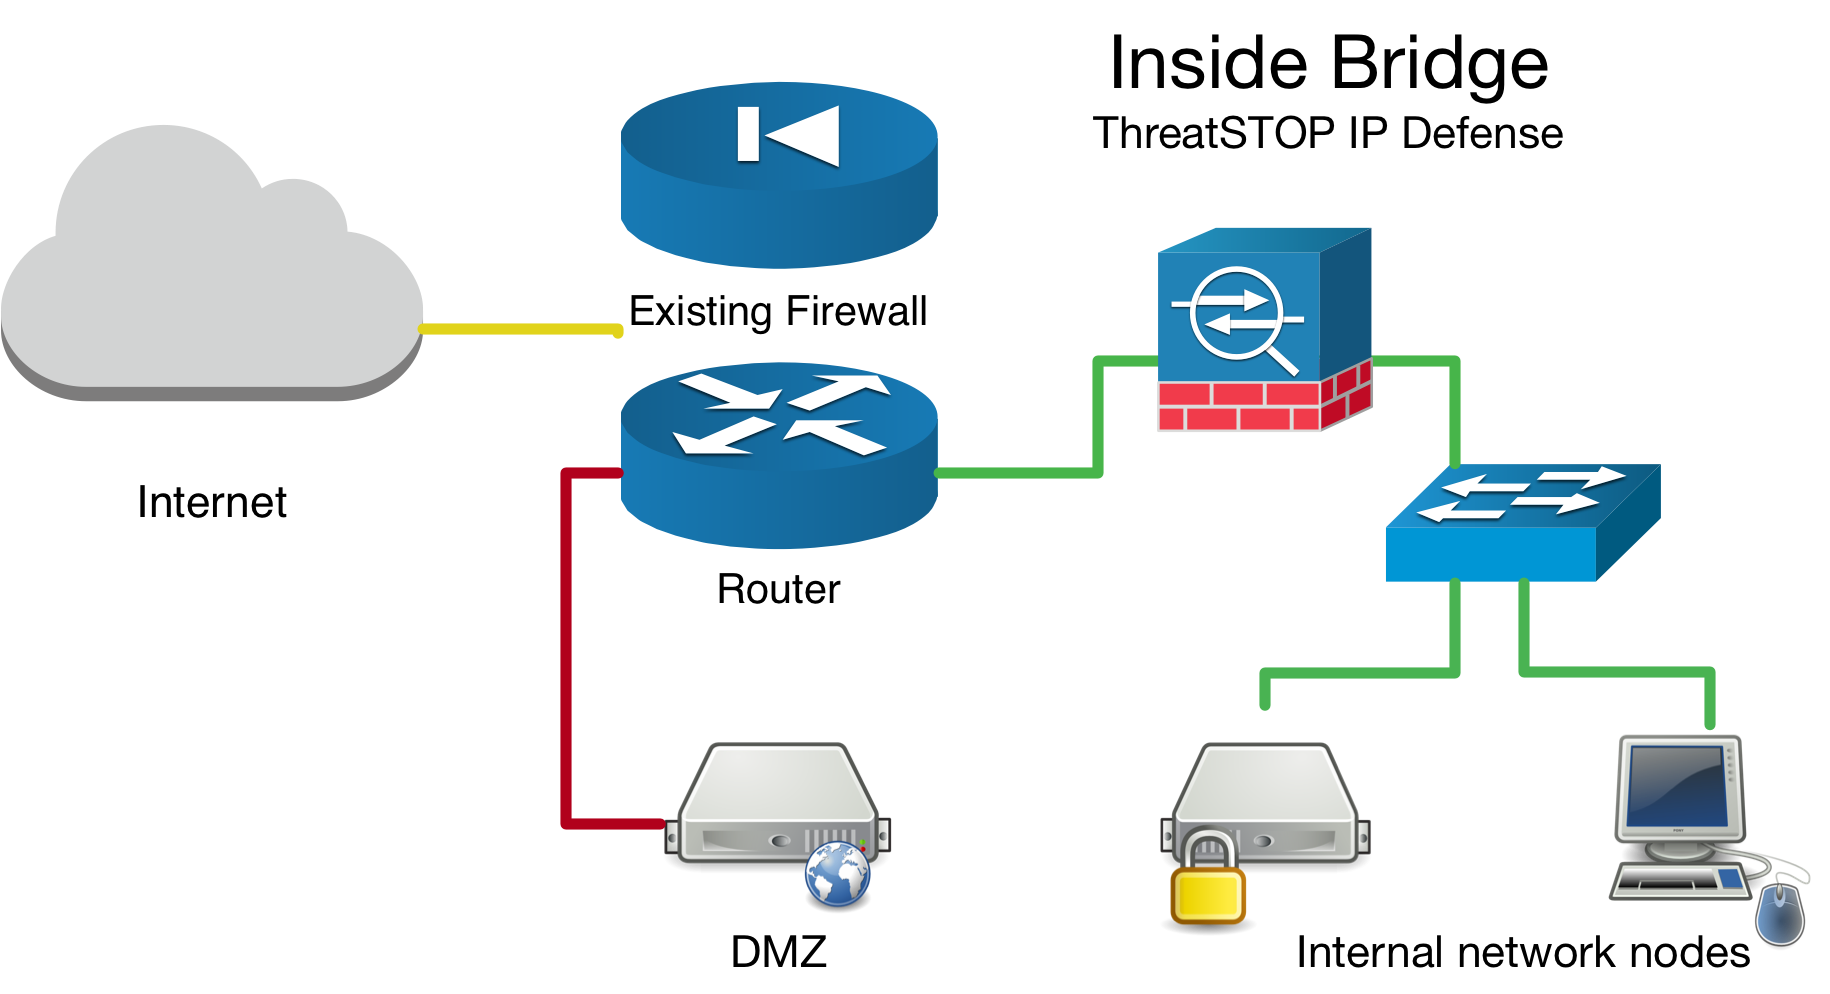
Network Bridge Considerations
If you have setup your device as a network bridge it is important to make sure you enable the Packet filter on bridge interface checkbox see this guide. Aside from bridge specific setup, the ThreatSTOP integration steps are the same for bridges as they are for routers.
More information about Netgate setting up a transparent bridge available here.
Inside Bridge Example
Outside Bridge Example

Placement of device in network topology
If you are installing this device in an environment that already has a firewall/router it is preferable to install the ThreatSTOP device “inside” the firewall/router if it is doing NAT to track down infected machines on your network. Otherwise the logs will only see the single IP address from the next hop instead of the true source node’s IP address.
Install Parameters
Please make note of the following settings while going through the installation prompts.
| Setting | Value |
|---|---|
| Device ID | Retrieved from the device settings page |
| Auto Key | Retrieved from the device settings page |
Installation Overview
This document will go over installation and integration of ThreatSTOP via web automation directly on to your pfSense device. The basic steps are as follows:
- Add & Configure device in Admin Portal
- Install ThreatSTOP software
- Configure ThreatSTOP service on device
- Test configuration / logging.
Prerequisites
- Device added & configured via the admin portal.
- Firewall Device setup as either a router or a network bridge.
- SSH access to the device.
- Current active ThreatSTOP account.
- For web automation you will need to have your time synced
- Firewall table size set high enough to accommodate your policy
Warning: Prior to installing the ThreatSTOP package, you will need to increase the Firewall Maximum Table Entries size to at least 400,000 entries in System > Advanced, Firewall & NAT.
- If you are running pfSense on a flash filesystem (or another filesystem that is read only by default), you will have to temporarily mount the root filesystem as read/write. This is done by entering the following command in the SSH session:
mount -uw /
Connectivity
To retrieve its configuration and policy, and to upload log data, the device needs the following connectivity:
- DNS over TCP - Policy service
- Hostname: ts-dns.threatstop.com
- IP Address Range: 192.124.129.0/24
- Outbound TCP port 53 or 5353
- DNS over TLS - Configuration service
- Hostname: ts-ctp.threatstop.com
- IP Address Range: 204.68.97.208/28
- Outbound TCP port 5353
- HTTPS - Log service
- Hostname: logs.threatstop.com
- IP Address Range: 204.68.99.208/28
- Outbound TCP port 443
- Direct Connection or via Proxy
- NTP
- Hostname: time.nist.gov
- Outbound UDP port 123
Setup
Step 1 - Portal device configuration
During this step, you will create a device entry on the Admin Portal. You will select a device type and enter the configuration settings. A minimum configuration only requires a handful of settings but optional, advanced settings are also available.
To create a device entry:
- Log into the Admin Portal with your ThreatSTOP account
- Browse to the Device page and click Add Device
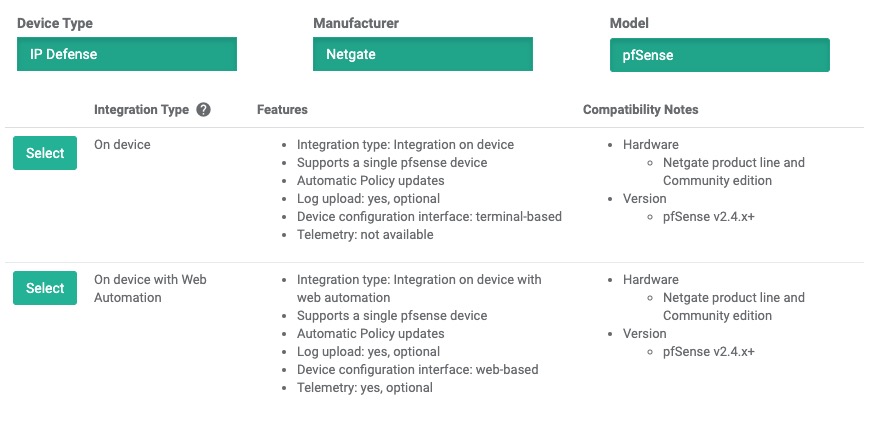
- Select the model:
- Type: IP Defense
- Manufacturer: Netgate
- Model: pfSense
- Integration Type: On device (Web Automation)
The Admin Portal will display a form to enter the device settings described below.
-
Nickname: this is a mnemonic name used to identify the device. It can be set to any string (A-Z, 0-9, - and _). If you create multiple device entries, each entry must have a unique nickname. The Nickname will be used to identify the device on the device and in the Reporting user interface.
-
Policy: select a pre-defined policy or a customized policy. It must be an IP Defense Policy.
-
IP Type: Access to the ThreatSTOP services is controlled in part using an ACL allowing the device IP to connect. If your device has a static public IP address (the most common case), select static. If your device has a dynamic public IP address, the ThreatSTOP services can lookup the IP address using a DNS fully-qualified name (FQDN).
-
Public IP address: In static mode, this is the public IP address of the device. It is possible to configure multiple device entries with the same public IP address.
-
Note: An optional field to store a note of your choice about the device - location, identifiers, model…
Step 2 - Download Software
The download link is listed in the Step 2 section, as shown in this image.
- Click on the Copy Download Link to copy the link to your clipboard
- Using ssh, login as root to your pfSense device and type the following commands
# first we will download the software from out public repo
curl -o ./ts-pfsense-2.07-01.pkg -sO https://downloads.threatstop.com/pub/ts-pfsense.pkg
# For your security: after downloading the file, we encourage you to validate its SHA 256 checksum. Compute it as shown below and compare it to the checksum in the Portal.
shasum -a 256 <filename>
# now we install via pkg facility
pkg install -y ./ts-pfsense-2.07-01.pkg && rehash
# you will be prompted with some dependencies if they are not already on the system.
# next try running tsadmin, if you get error, you may have to log out / back in or run `rehash` to reindex the new applications
# Due to recent changes in the default sudoers file you may need to switch to the threatstop service account to perform the following commands.
su - threatstop
# to verify you are now the threatstop user run id
$ id
uid=1501(threatstop) gid=1501(threatstop) groups=1501(threatstop)
# the following is an example to show we have tsadmin in path and ready to install.
$ tsadmin version
        ThreatSTOP ts-pfsense version starting @ Wed Oct  2 22:34:35 2019

ts-pfsense Version: 2.07-01
Step 3 - Configuration
-
SSH into the pfSense device with an admin account. If you are not root make sure you run commands prefixed with
sudo. -
To begin configuring the device, first switch into the
threatstopservice account by runningsu - threatstop, then run the following command:tsadmin add --type=auto --device_id=[Device ID] --auto_key=[Device Key]Note: During this step, the tsadmin will attempt build a secure channel to pull down all settings to configure itself. -
The CLI installation will pull down the following configuration settings for you as configured on the admin portal.
-
Device ID: This is the device identification used to associate logs and settings to specific device.
-
Block list: This is the ThreatSTOP block list given in the quick settings section or referenced in the portal.
-
Allow list: This is the ThreatSTOP allow list given in the quick settings section or referenced in the portal.
-
Maximum Policy Size: Option limit on the number of entries in the policy. If the policy becomes larger than this setting, the device will truncate it down to the Maximum Policy Size.
Advanced Settings
- DNS Port: The device uses TCP Port 53 (outbound connections) to retrieve policy data. If this port is blocked or filtered (for example, networks using a DNS Application Layer Gateway), use this setting to switch to TCP Port 5353.
-
-
Next, you will be asked to confirm ThreatSTOP install. After you accept, the software will stage installation files and attempt to fetch the latest policy.
-
Once the ThreatSTOP software is installed you can enable the policy by going to your devices web interface, then selecting Firewall > ThreatSTOP and sliding the disabled button into the enabled state.
Now, proceed to “Testing your Configuration” step below.
Step 4 - Testing Configuration
To ensure your device is properly blocking and logging traffic, test traffic to a known test address in both directions. The following logging demonstrates traffic being dropped by the firewall rule-set in both directions by the TS-inbound firewall rule set.
# first we test to see if bad.threatstop.com's IP address is being blocked. This is a safe IOC to use for testing.
admin@pfSense# dig +short bad.threatstop.com
64.87.3.133
# next, we verify it is in the ThreatSTOP block list.
admin@pfSense# grep 64.87.3.133 /var/db/aliastables/ThreatSTOP_block.txt
64.87.3.133
# The following step is best done on a client machine routing through the firewall.
# We'll try to curl or visit the address http://bad.threatstop.com to see if we can generate a block and log event.
curl bad.threatstop.com # or attempt to visit with a web browser
# check logs to confirm physical interface direction and that the ThreatSTOP rule matches in both directions
admin@pfSense# clog /var/log/filter.log | grep 64.87.3.133
Sep 20 23:37:41 pfSense filterlog: 6,,,1000000104,em1,match,block,out,4,0x0,,64,0,0,DF,6,tcp,52,64.87.3.133,192.168.56.1,80,57232,0,RA,1848334924,822794810,513,,nop;nop;TS
If you see the logged test blocks, Congratulations, you’ve now protected your network with a world class security threat feed!
Be sure to read our Portal Guide to get the most out of our advanced reporting features.
- To check the IPFW configuration, run
[2.4.3-RELEASE][admin@pfSense.localdomain]/root/ts-pfsense: pfctl -sr | grep -i threatstop
pass in log quick on em0 inet from any to <ThreatSTOP_allow> flags S/SA keep state label "USER_RULE: ThreatSTOP_incoming_lan"
block drop in log quick on em0 inet from any to <ThreatSTOP_block> label "USER_RULE: ThreatSTOP_incoming_lan"
pass in log quick on em1 reply-to (em1 172.21.70.1) inet from <ThreatSTOP_allow> to any flags S/SA keep state label "USER_RULE: ThreatSTOP_incoming_wan"
block drop in log quick on em1 reply-to (em1 172.21.70.1) inet from <ThreatSTOP_block> to any label "USER_RULE: ThreatSTOP_incoming_wan"
Configuration changes
Changing the policy
* Update the policy assigned to the device in the Admin Portal
* Wait 15 minutes for the changes to propagate to ThreatSTOP's policy service
* The web automation periodic update should pick up new changes and apply them automatically. Please check the Firewall > ThreatSTOP page to verify new policy details.
View the networks contains in the current policy
* Login into pfSense's webConfiguration
* Open the **Diagnostics > Tables** menu
* Select the **ThreatSTOP_block** or **ThreatSTOP_allow** to view the subnet list.
Disable the ThreatSTOP policy
* Login into pfSense's webConfiguration
* Open the **Firewall > ThreatSTOP** menu
* Click **disable**
Other Operations
Upgrading
- log into the web interface and go to Firewalls > ThreatSTOP
- from this status page you’ll be able to disable, then remove the integration
- next remove the package by running
pkg remove ts-pfsense. Netgate recommends removing all packages you’ve installed prior to upgrading. - you can now proceed installing the new pfSense version.
How to check your version
$ tsadmin version
2.07-01
Builds older that 2.x have their version listed in a VERSION file in the code directory. Another quick way of identifying your version is tsadmin command was introduced in v2.00. If your build does not have this command it is v1.x.
Command Manual
tsadmin has several sub commands to perform various functions outlined below. Sub commands are interpreted differently by the tsadmin & do not have a -- before them.
- add The add command install & configures the ThreatSTOP service on the device.
- remove This command removes the ThreatSTOP integration from the device.
- update This command forces the device to update it’s policy as well as check for new settings if web automation installation is used.
- show This command shows the configured settings.
- version This command shows the current version of installation package.
- logs This command forces logs to be sent to ThreatSTOP as well as restarting logging facilities if needed.
tsadmin add sub parameters
The following tsadmin add sub parameters can be added inline to seed the installation. If you are installing via web automation you will only be using auto_key and device_id.
- advanced Run advanced prompts. i.e.
--advanced - allow_list ThreatSTOP Allow list. i.e.
--allow_list=[allow list] - auto_key Web Automation configuration key i.e.
--auto_key=xxxxxxxxxxxx - block_list ThreatSTOP Block list i.e.
--block_list=[block list] - device_id ThreatSTOP device ID (TDID). i.e.
--device_id=[Device ID] - dns_server DNS server
- maxpolicysize Maximum size of block list items (%20 for allow list).
- port DNS port for upstream queries
- silent Suppress output & auto accept all prompts. Useful when automating cli installs. i.e.
--silent - skip_checkpolicy Skip validating your ThreatSTOP policy exists and reachable. Useful in offsite installations.
- skip_checkvalidip Skip validating your public IP address is registered with ThreatSTOP. Useful in offsite installations.
- take_defaults Auto accept all prompts with confirmation countdown. Useful when automating cli installs. i.e.
--take_defaults - type Installation type (auto - web automation, manual - via the CLI prompts). Defaults to manual
Additional Information
Troubleshooting
- Failed to retrieve policy error message
- If you receive this error message while configuring the ThreatSTOP software, check the connectivity to the ThreatSTOP DNS service described above.
- If this is a new policy or device, wait 15 minutes for the configuration to propagate.
- If the issue persists, please contact ThreatSTOP support.
- There were error(s) loading the rules: /tmp/rules.debug:18: cannot define table bogonsv6: Cannot allocate memory - The line in question reads [18]: table persist file “/etc/bogonsv6”
- If this error is displayed after enabling ThreatSTOP in the webConfiguration, please make sure that you have increased the firewall table maximum size.
- See for additional information.
To get a list of configured settings run:
tsadmin show
To get a full list of available command line parameters on the command line type:
tsadmin --help
If you are not able to download the policy, run the following:
admin@pfSense# curl http://logs.threatstop.com/cgi-bin/validip.pl
Your IP address: 1.2.3.4
Address is in the list of authorized hosts
This will tell you if your public IP address is authorized to access the policy.
-
Call to undefined function get_interface_ruleindex() There may have been a problem with a recent upgrade. You should remove all packages you’ve installed, backup your configuration, reinstall via the latest stable release media, restore the configuration, then reinstall the packages including ts-pfsense package.
-
Fatal error: Uncaught TypeError: array_push(): Argument #1 ($array) must be of type array, null given in /usr/local/www/tsenable.php:213
If you have upgraded your pfSense OS e.g. 2.6.0->2.7.2, and you get the error messages above when trying to enable the policy it’s likely caused by old packages being installed via command line and not seen by the Web interface. To fix simply open up the pfSense Web UI > System > Package Manager > Search for and install sudo and stunnel packages. You should be able to enable the policy after.
- Sorry, user root is not allowed to execute ‘/bin/sh -c /usr/local/bin/tsadmin add’ as threatstop on pfsense
This error is due to defaults in the /usr/local/etc/sudoers configuration file for the root account. You can switch into the ThreatSTOP user account threatstop by running su - threatstop or sudo su - threatstop then proceeding with the tsadmin command as shown in the documentation. Alternatively, if you wish to be able to run the commands as the standard root account you can modify the sudoers file e.g. root ALL=(root) ALL to root ALL=(root,threatstop) ALL.
Version Changelog
| Version | Release Date | Notes |
|---|---|---|
| 2.07-01 | 2025-08-20 | Support for pfSense v2.8.0,v2.8.1 |
| 2.05-05 | 2023-11-20 | Support for pfSense v2.7.2 |
| 2.05 | 2023-11-13 | Support for pfSense v2.7.0 |
| 2.04 | 2022-04-15 | Support for pfSense v2.6.0 |
| 2.03-02 | 2021-06-17 | Hostname & Telemetry bugfix |
| 2.03 | 2021-03-31 | Support for pfSense v2.5.0 |
| 2.00 | 2019-10-07 | Support for pfSense v2.4.4/ PHP7 / web automation integration / enhanced integration UX |
| 1.05 | 2018-06-07 | Support for pfSense v2.4 Error handling and UI enhancements |
Uninstalling ThreatSTOP
- To uninstall the ThreatSTOP integration:
- Login into pfSense’s webConfiguration
- Open the Firewall > ThreatSTOP menu
- Click disable
- Click Remove ThreatSTOP
- You can reinstall the software by re-running the setup procedure
- You can also remove it by running
tsadmin removewhile logged in via SSH.
Time Sync
We recommend you keep your firewall’s time synced if you intend to use our web automation services. It is required to provide a secure channel of communication to the device for persistent configuration & updates.
Please review and set per your manufacturers recommendation.
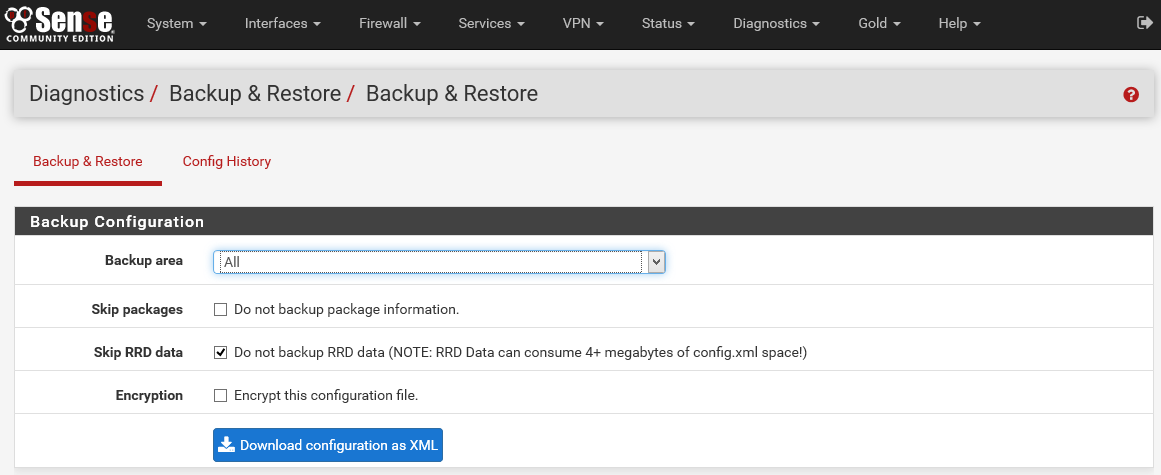
Backup previous configuration
It is recommended that you save the current configuration before applying ThreatSTOP. This can be done from the Diagnostics: Backup/Restore page of the webConfigurator.
Restore previous configuration
We create a backup of a few key configuration directories prior to install. Simply go to the ThreatSTOP status page via the web-interface (Firewall=> ThreatSTOP menu) and click the “Remove ThreatSTOP” button after disabling the service. You can also run tsadmin remove from the command line if logged in via SSH.
If all else fails contact support for assistance.