Overview
Customers can utilize ThreatSTOP policies in the Bandura platform. Integration of ThreatSTOP and Bandura is accomplished by creating a ThreatSTOP Policy, enabling that Policy as a Security (SIEM) Integration in the ThreatSTOP Portal, and associating that Policy to Bandura’s plugin for ThreatSTOP. This document describes how to setup and manage this integration.
Bandura’s platform consists of a SaaS component for managing threat intelligence and policy data, and reporting, and ThreatBlockr, an appliance that performs detection and enforcement of security policies against network traffic.
Access to this feature
The integration requires ThreatSTOP’s ThreatList feature. Access to this feature must be enabled in your product plan. Please contact your ThreatSTOP representative if your current plan doesn’t include it.
Features
The integration enables the automated creation of ThreatSTOP IP and domain-based Policies that can be utilized as block and allow lists by the Bandura Platform. The integration enables mutual customers to leverage the ThreatSTOP and Bandura platforms to detect and block IP and domain-based threats using threat intelligence at a scale.
ThreatSTOP policies are built from categorized threat intelligence that map to some or all of the following Bandura lists:
- IPv4 Denied List
- Domain Denied List
- IPv4 Allowed List
- Domain Allowed List
Note: This integration doesn’t provide ThreatSTOP’s log upload and reporting features.
Compatibility
| Manufacturer | Version |
|---|---|
| Bandura GMC | GMC v24+ |
Connectivity
To retrieve its policy, the device needs the following connectivity:
- SSH (SFTP)
- Hostname: threatlist.threatstop.com
- IP Address Ranges: 64.87.26.144/28 204.68.99.208/28
- Outbound TCP port 22
Data formats
ThreatSTOP’s Bandura integration files are in a CSV format with the following headers:
"IOC","Category","SubCategory","Severity","FirstSeen","LastSeen","Geo","IOC Type"
The Geo field is ISO-8859 encoded. All other fields are 7-bit ASCII.
Configuring ThreatSTOP
Requirements
Customers need an active ThreatSTOP account with access to the SIEM Integration and Custom Policies features. If your account does not have these features, please contact your ThreatSTOP representative.
Bandura Integration files (aka ThreatLIST files) are generated from one or more of your custom policies. Enabling the feature is done in two steps:
- Step 1: configure the global settings for the feature.
- Step 2: configure the policy to be exported.
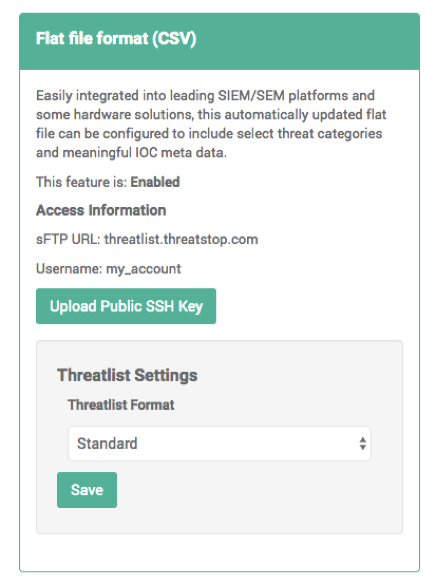
Setup - Global settings
- Navigate to the SIEM Integration tab in the navigation menu.
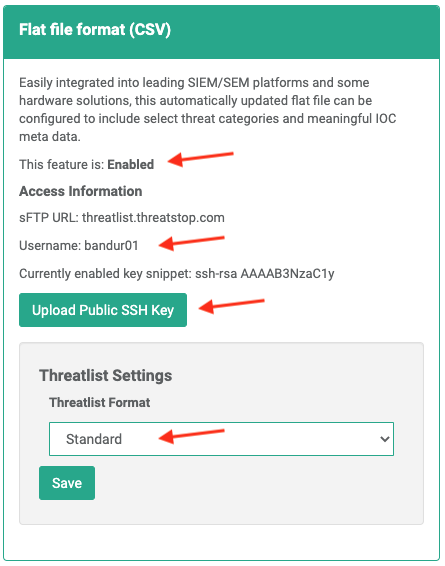
- Ensure the feature is shown as Enabled
- Copy your Username to someplace handy for use in the Bandura setup.
- Upload your Public SSH Key (RSA or OpenSSH)
- Using the dropdown, choose the Standard ThreatLIST format.
- There are several variables that will be replaced with information about each indicator of compromise (IoC) when your file is generated:
- %ioc is the IP address from ThreatSTOP.
- %blocker_desc is the name of source category of the block.
- %blocker_type is the type of threat.
- %priority is how dangerous the threat is
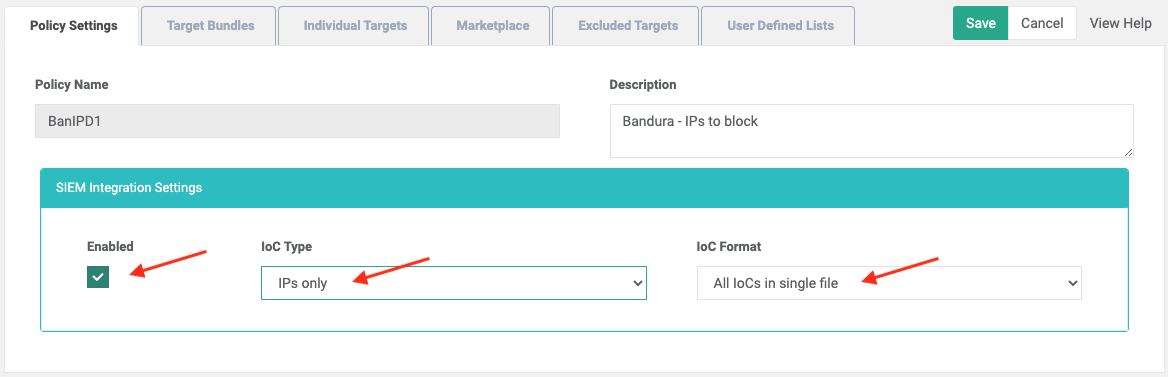
Setup - Policy settings
- Browse to the policy configuration for each ThreatSTOP policy you want to integrate with Bandura.
- Enable SIEM integration (Enabled checkbox).
- There are three configurations to set by choosing from the dropdowns.
- Set the ThreatLIST IOC Type. This determines what type of IoCs will be included in your Integration file. Your choices are:
- IPs only.
- Domains only.
- All (both IP addresses and domains).
- Set the Threatlist IoC Format to All IoC Types in a single file.
- Save your changes.
Accessing the ThreatLIST Integration files
The ThreatLIST files will be produced and made available for you at threatlist.threatstop.com. The files need to be accessed via SFTP using the SSH Key credentials you provided during setup.
The files follow this naming convention:
threatlist-<policy_name>-<ioc type>-<timestamp>.csv threatlist-<policy_name>-<ioc type>-latest.csv
Where:
- Policy name is the name of the Policy being exported.
- ioc type is IP, domain, or all (for ThreatList setting requesting both IP addresses and domains).
- YYYYMMDD-hhmm is the timestamp at which the file was produced. The -latest file always points to the latest version.
For example:
threatlist-my_policy-ip-latest.csv
Configuring Bandura
Requirements
Customers need to have access to Bandura Cyber Global Management Center running Build 24 or later (20 Nov. 2020).
Setup
After creating the ThreatLIST file in ThreatSTOP, customers can create corresponding Denied or Allowed lists in Bandura. In order to create a list, customers will need the following information:
- User Name - This is the ThreatSTOP ThreatLIST Username found in the “Flat file format (CSV)” modal on the “SEIM Integration” page of the ThreatSTOP Portal.
- SSH Key - This is the Private SSH Key that pairs with the Public SSH Key uploaded to ThreatSTOP during setup.
- SSH Passphrase (Optional) - If the SSH Key created is encrypted (highly recommended), a password to accompany the SSH Private Key is required.
- Policy - The exact name of the ThreatSTOP Policy to be used in the creation of the list.
- Indicator of Compromise - The IoC Type as established for the Policy in ThreatSTOP.
Create the List
- Log into the Bandura console
- Select either Denied or Allowed from the left menu.
- Then, choose either IPv4 or Domain to set the appropriate IoC type based on the ThreatSTOP configuration choices you made.
- Click the green plus icon in the top right corner. In the Create Denied or Allowed List modal that opens, Choose ThreatSTOP [IPv4 or Domain] Denied List as the Type.
- Give this list a Name (required) and add a description if desired (optional).
Note - The recommended Interval in Minutes is 60, this represents how often Bandura will check for ThreatLIST updates to the ThreatSTOP Policy.
Authentication
Customers will need to reference the SSH credentials provided during the ThreatSTOP setup. Please note that each of these fields is case sensitive and must match the values entered in the ThreatSTOP Portal exactly.
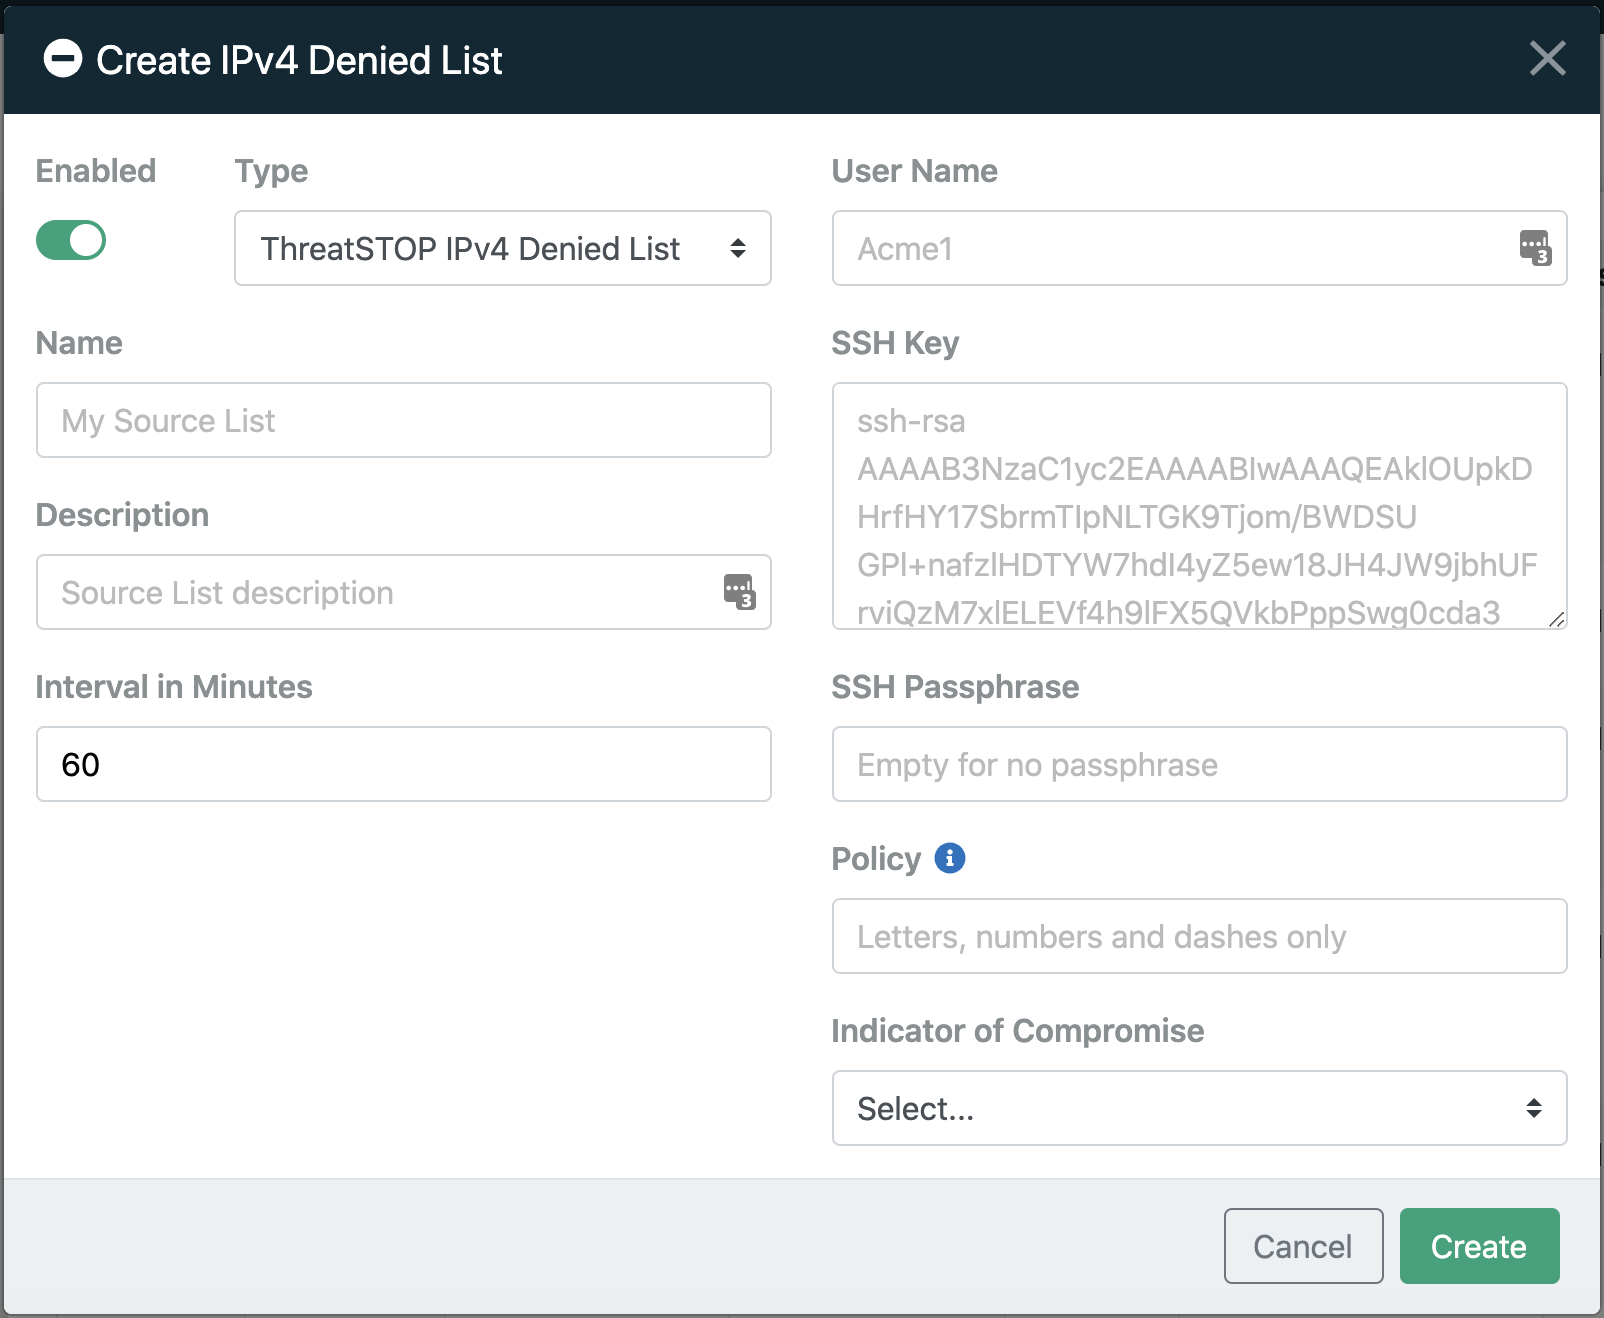
- User Name - The ThreatLIST Username found in the ThreatSTOP Portal.
- SSH Key - The Private SSH Key including any leading and trailing lines (such as “—–BEGIN OPENSSH PRIVATE KEY—–”, “—–END RSA PRIVATE KEY—–”, etc.)
- SSH Passphrase (Optional) - If the password that accompanies the SSH Private Key.
- Policy - The ThreatSTOP Policy name.
- Indicator of Compromise - The IoC Type chosen during ThreatSTOP setup.
Once the information has been entered, click Create to add the new list. The newly created entry will be seen on the list.
Please note that it may take 10-15 minutes to begin pulling the indicators from ThreatSTOP. Also, for newly created ThreatSTOP policies, the file pulled from ThreatSTOP can take up to 2 hours to be created and become available for Bandura to pull.

Support
Customers with questions or needing assistance in configuring the Bandura Global Management Center or the Bandura ThreatBlockr Appliance should contact the Bandura Support team at support@banduracyber.com or by calling +1-855-765-4925.