Integration Overview
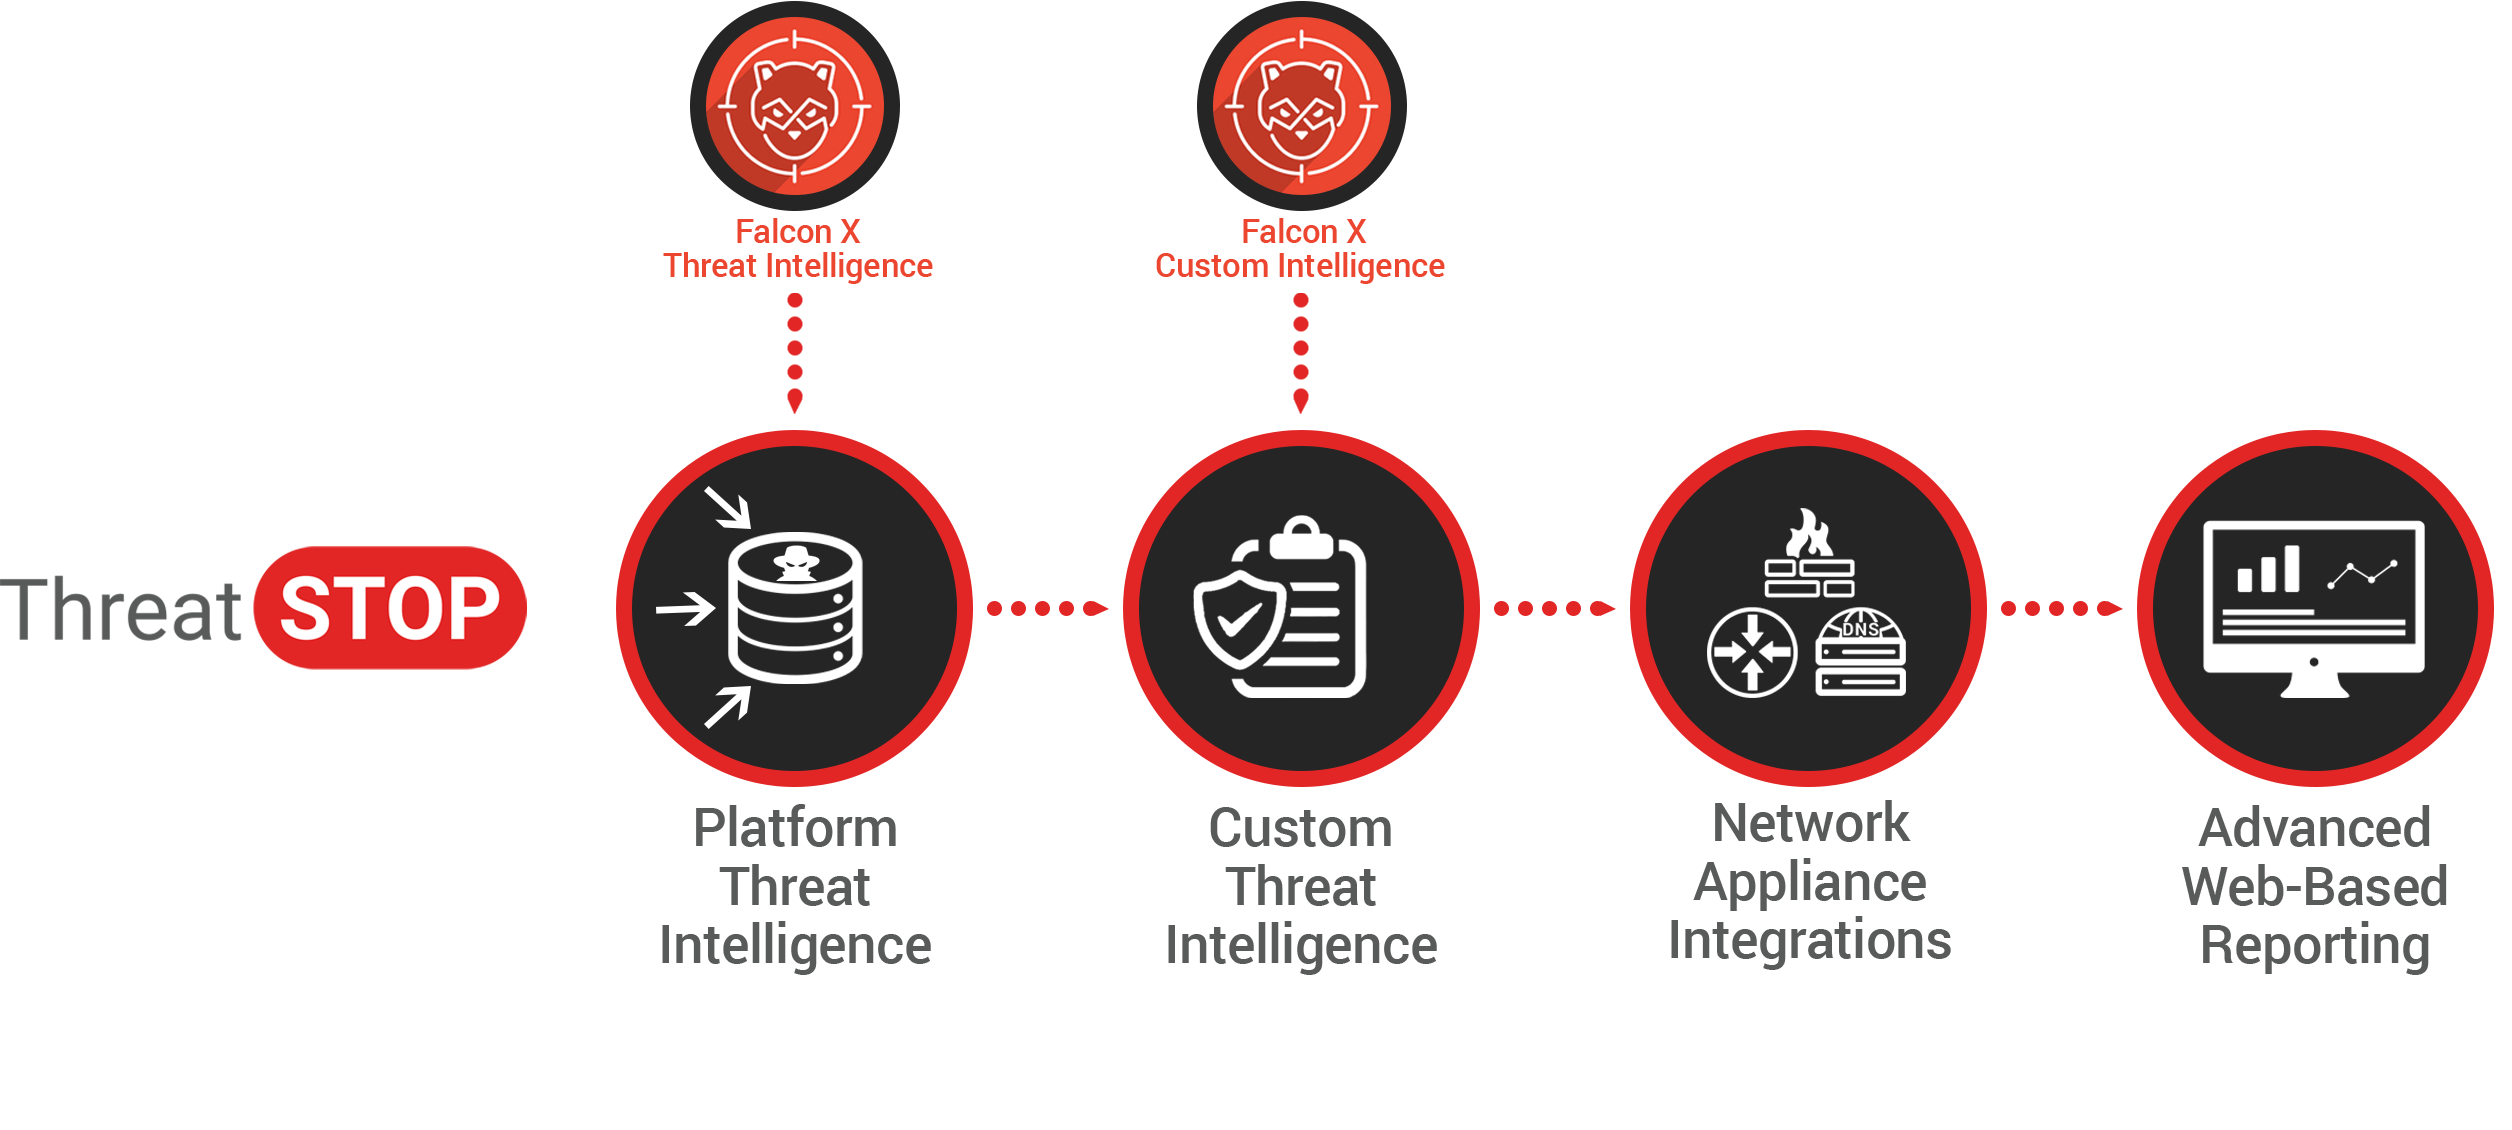
ThreatSTOP’s platform supports integration with CrowdStrike Falcon X threat intelligence. Through this integration, customers with active subscriptions to both CrowdStrike Falcon X and ThreatSTOP can utilize Falcon X Indicators of Compromise (IOCs) in ThreatSTOP policies to protect their networks.
Use of these integrated solutions enables automated enforcement and reporting of communications with APT threats across network enforcement points such as firewalls, routers, and DNS servers.
You can watch a short video of an integration being configured below:
Indicator Compatibility
Falcon X enables security practitioners to research and work with various types of IOCs ranging from file names to MD5 hashes. Only the IP Address and Domain Indicator types from Falcon X are compatible with the ThreatSTOP integration.
Integration Requirements
Setting up integration between Falcon X and ThreatSTOP requires:
- An active CrowdStrike Falcon X subscription, and a valid Falcon X API token with the API ID and API Secret. The API key must be an oAuth2 token with the Indicators (Falcon X) - Read permission
- An active (trial or paid) ThreatSTOP subscription, with the Falcon X Integration ThreatSTOP feature enabled.
To get a ThreatSTOP account, signup here: https://admin.threatstop.com/register If you already have a ThreatSTOP account and need the Falcon X Integration feature enabled, please contact support.
For a trial or paid CrowdStrike Falcon X account, please contact CrowdStrike directly: https://www.crowdstrike.com/contact-us/
Configuring ThreatSTOP
You’ll need to have an active ThreatSTOP account with the following ThreatSTOP features enabled in either a paid or trial subscription:
- Custom Policies.
- User Defined Custom Lists (UDL).
- Falcon X Integration.
Without these features enabled, the Falcon X integration can’t function. Please contact your ThreatSTOP sales representative to request that these features be enabled for your account.
Steps

- Login to your ThreatSTOP account at: https://admin.threatstop.com/.
- Expand the User Defined Lists section in the menu.
- Click either IP Lists or Domain Lists. You will want to select the appropriate UDL for the type of Indicators (IOCs) you plan to integrate from Falcon X, and the type of enforcement device that will utilize the integration.
- For Firewalls, Routers, switches and other TCP/IP devices that will use only IP or CIDR indicators, select IP List.
- For DNS servers, DDI/IPAM and other devices that will use Domains, or both Domains and IP/CIDRs, select Domain List.
- Click Add User List.
- Provide a Name for your list, and set the List Type to the desired enforcement action. You can optionally provide a description.
- Click Save User List, leaving all other fields unchanged for now.
- You’ll need to configure Falcon X before completing the integration. Proceed to step 1 of Configuring Falcon X.
Configuring Falcon X
You’ll need to have an active CrowdStrike account with the following CrowdStrike Falcon features enabled in either a paid or trial subscription:
- Falcon X Intelligence.
- A valid Falcon X API token, with the API ID and Secret, and the Indicators Read permission
Without these features enabled, the Falcon X integration can’t function. Please contact your CrowdStrike sales representative to request that these features be enabled for your account.
Steps
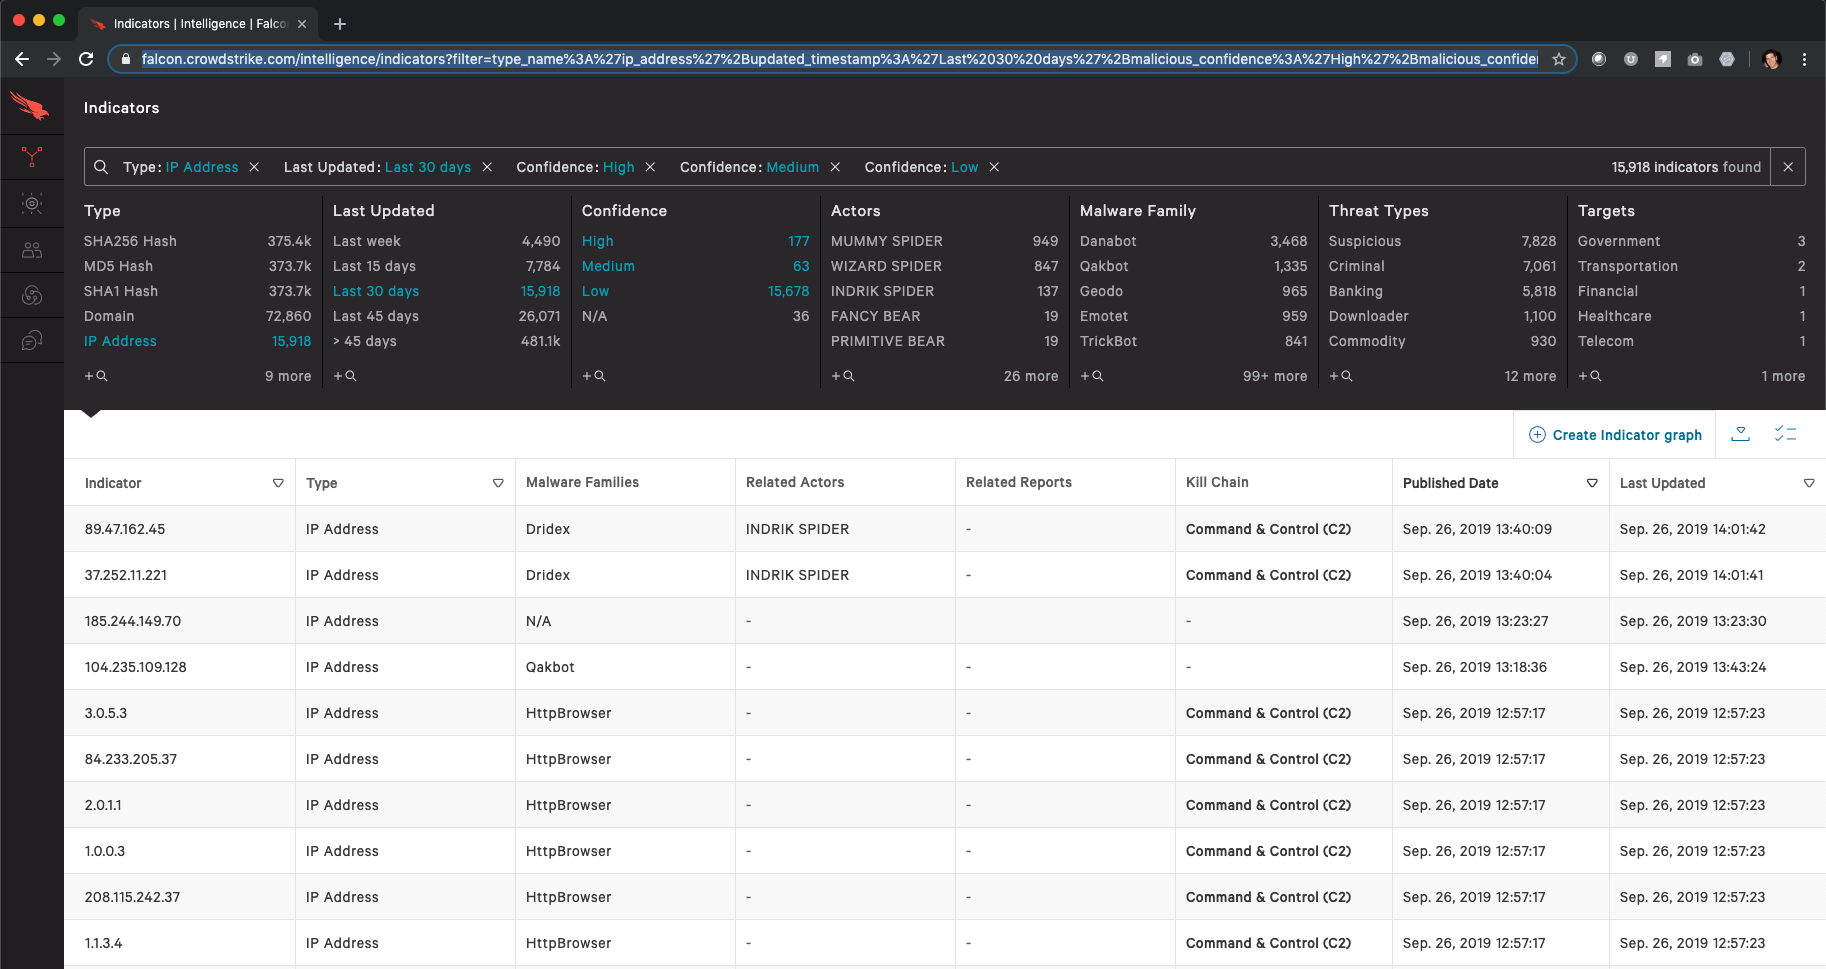
- Login to your CrowdStrike account at: https://falcon.crowdstrike.com/login/.
- Navigate to the Intelligence module, and select Indicators.
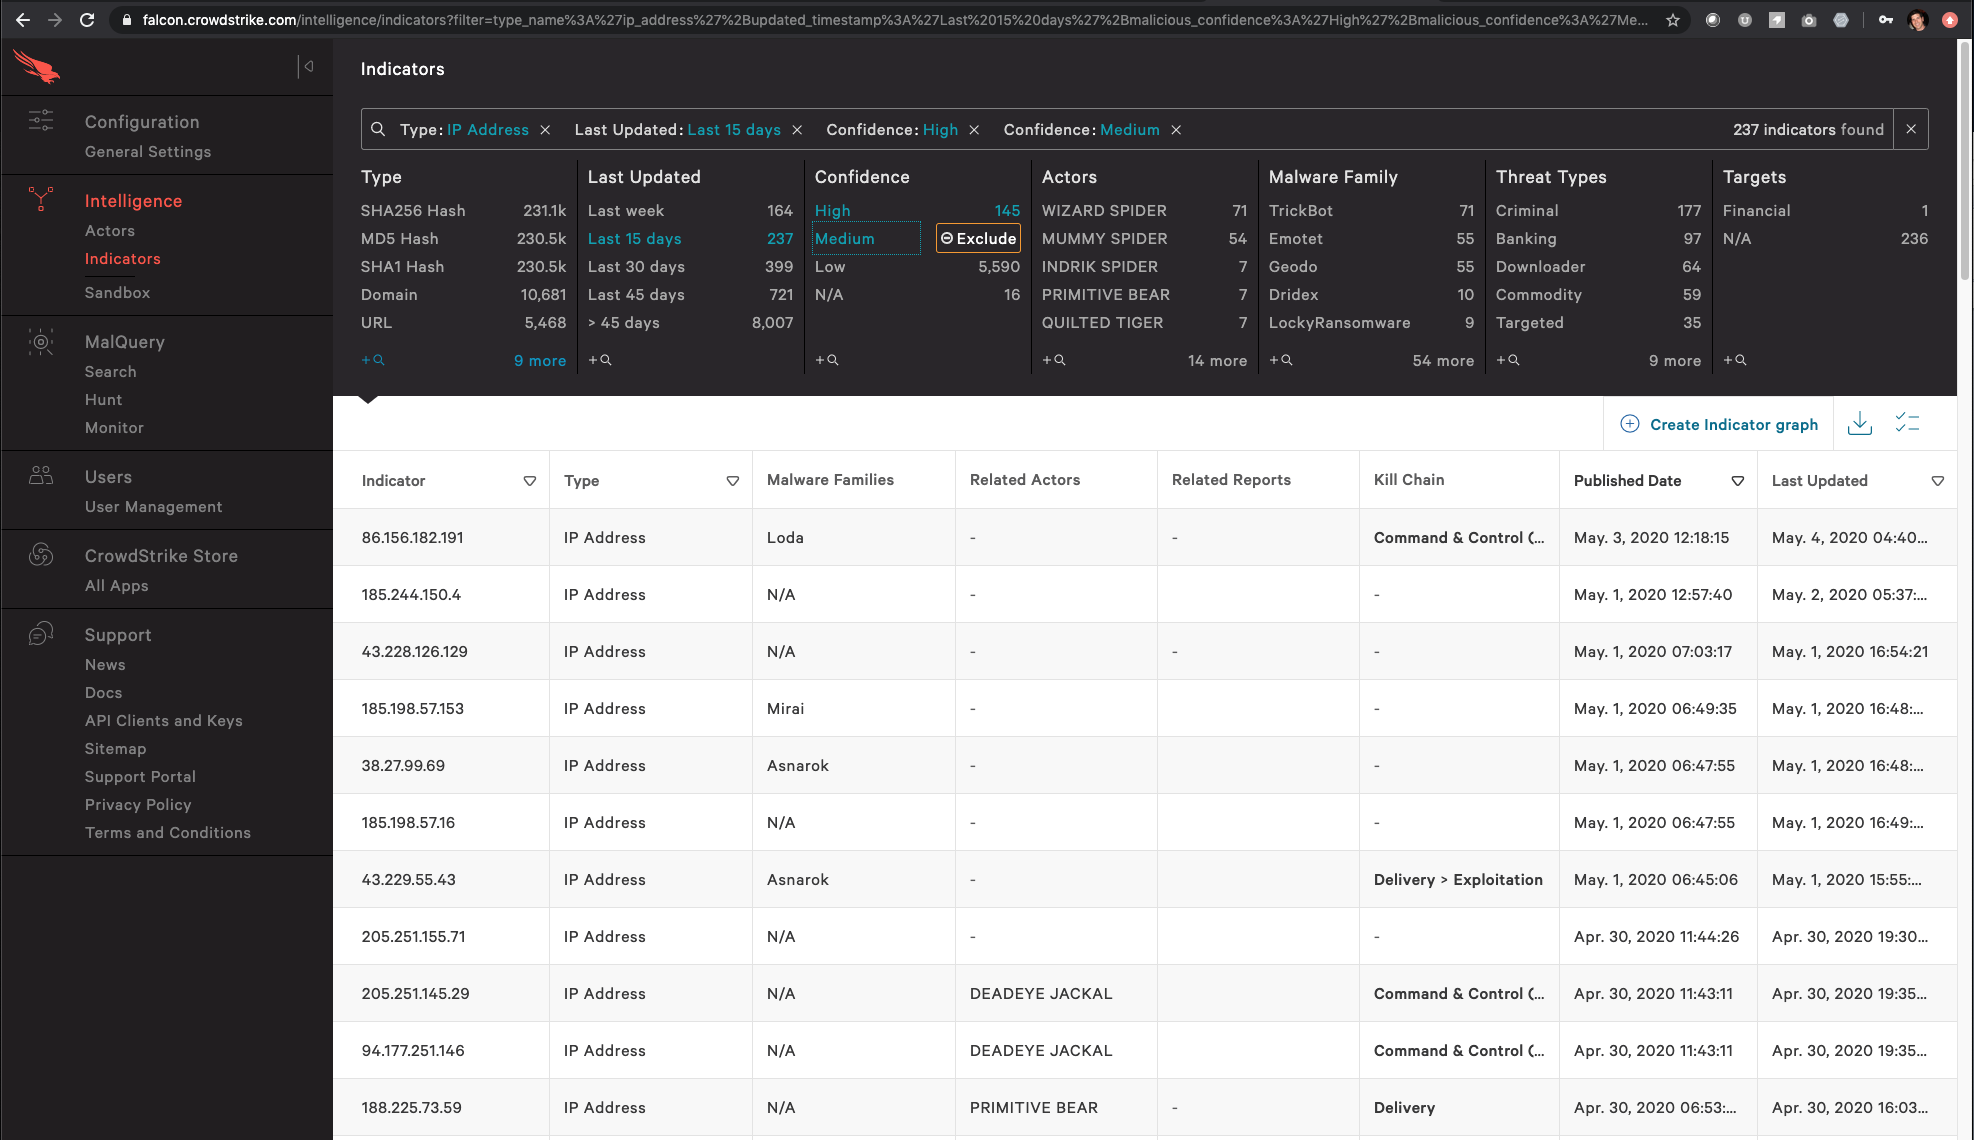
- Using the Indicator filtering tools:
- Select the Indicator Type (IP Address or Domain).
- Select a Last Updated time interval (e.g. Last 15 days).
- (Optional) Select one or more Confidence values (e.g. High, Medium).
- (Optional) Select up to one additional filtering value.
- After making your filter selections, Copy the entire URL (contents of the browser address bar) to your clipboard or a text document. You will need this to create the integration in the next steps.
Creating an Integration
In the following steps, you’ll integrate the filtered Falcon X intelligence and your ThreatSTOP User Defined List. You’ll include that User Defined List in a policy associated with a device, and test the functionality of the integration.
Steps
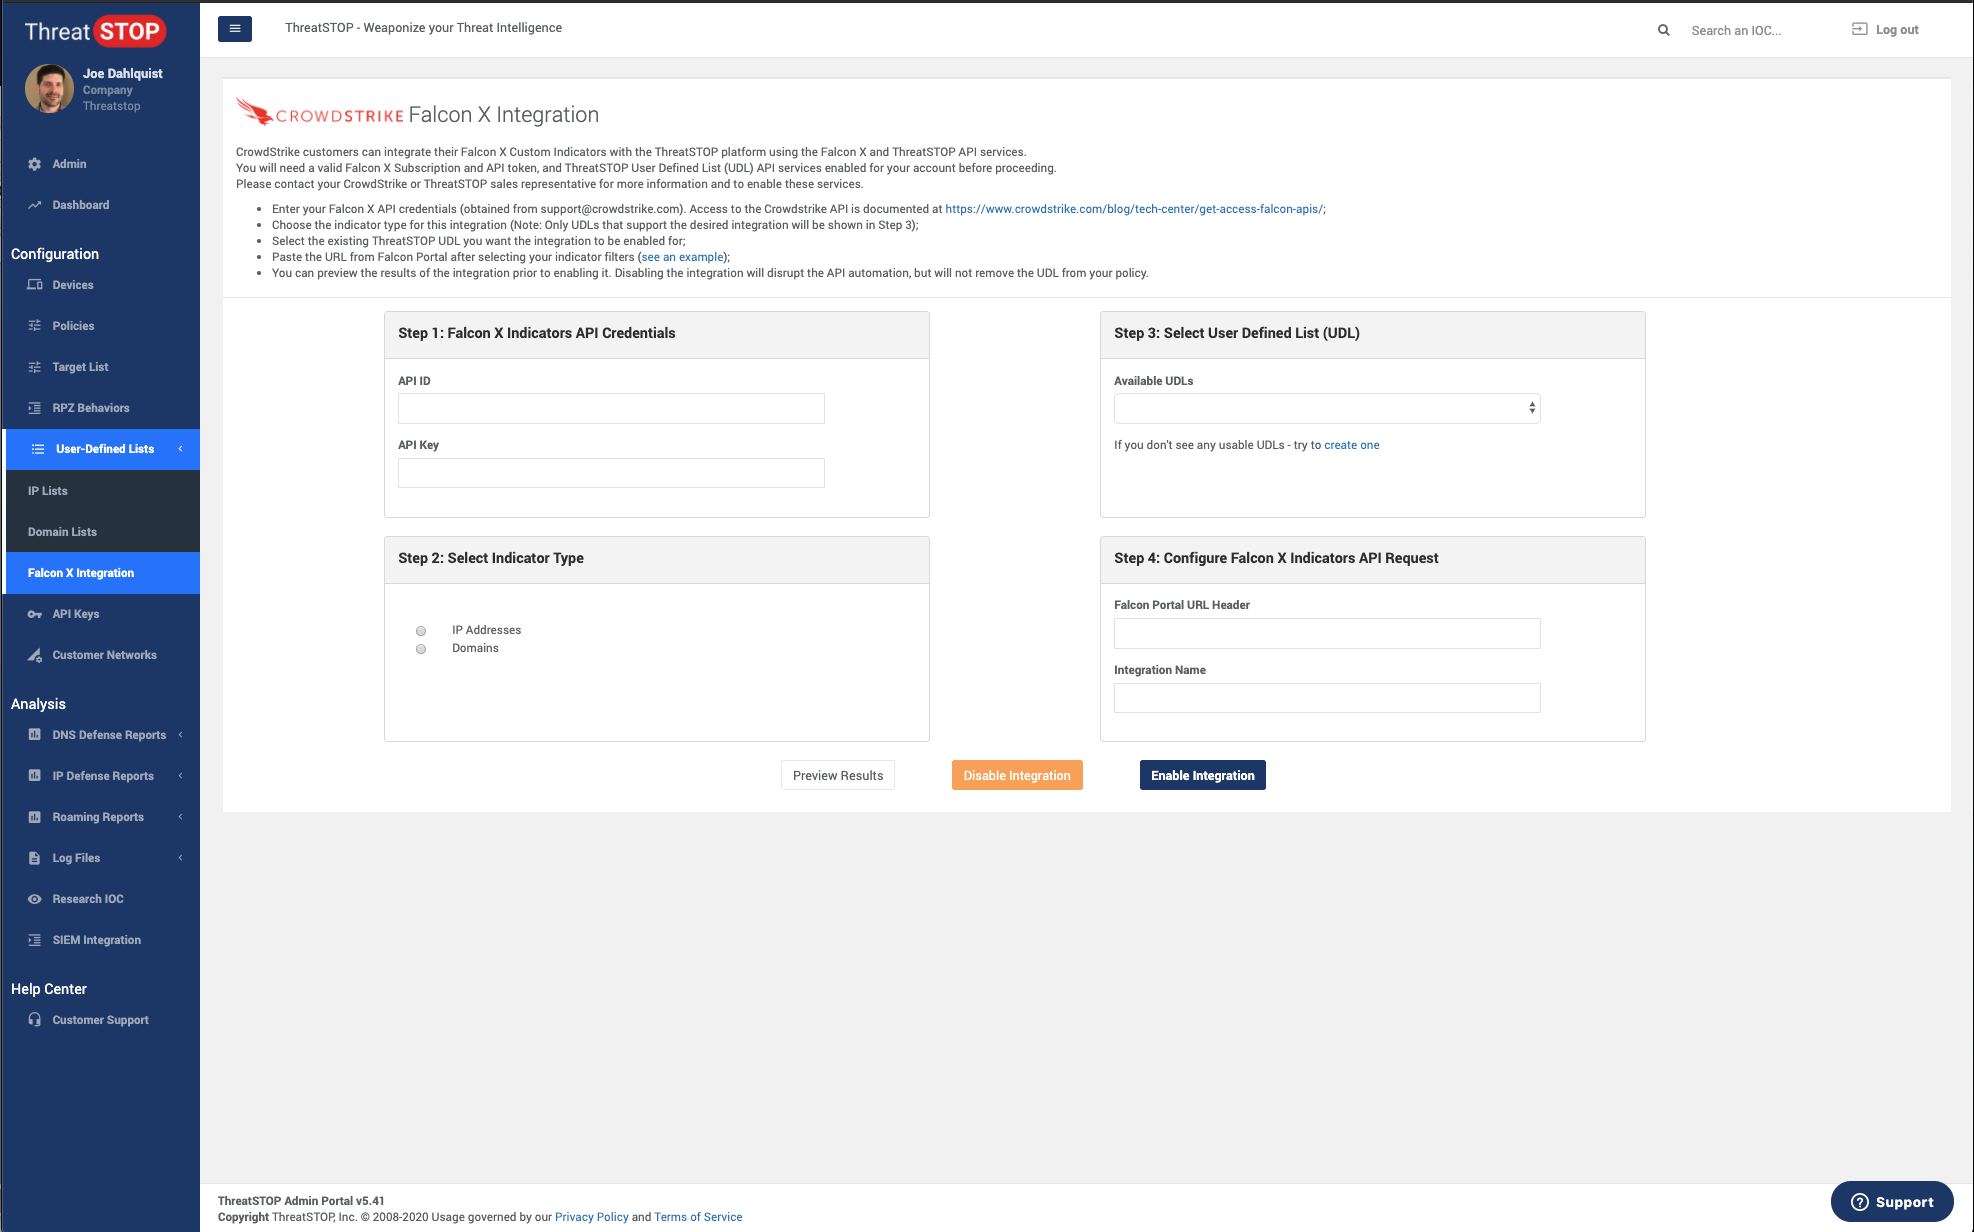
- Login to your ThreatSTOP account at https://admin.threatstop.com.
- Expand the User Defined Lists section in the menu.
- Click Falcon X Integration.
- On the new page, click the Add Integration button.
- Enter your CrowdStrike Falcon X API ID and API Secret.
- Select the Indicator Type that matches the filter selections you made.
- Select the User Defined List you created earlier.
- Provide the URL from the CrowdStrike Falcon X portal.
- Provide a Name for this integration.
- Click Preview Results to view the results of the integration. You should see the first set of Indicators from Falcon X if everything has been configured properly.
- Click Enable Integration to save and enable this integration.
- Create a new ThreatSTOP Policy, or edit an existing saved custom Policy, and add the newly created User Defined List associated with your Falcon X integration to that policy.
Any ThreatSTOP enabled network device using your ThreatSTOP policy will now include your filtered Falcon X indicators, automatically updated every 15 minutes (while enabled).
Adding or Removing Integrations
Multiple integrations can be created and enabled. This is helpful for using multiple enforcement device types or for segmenting policy content.
Enabled integrations can be disabled without deleting their configuration settings. This is helpful for temporarily disabling integrations for maintenance purposes. Open the integration page for a selected integration and click Disable Integration. You can re-enable the integration by clicking Enable Integration.
To delete an integration and all its configuration settings, click Falcon X Integration from the navigation menu. Locate the integration you wish to delete from the list view and click Delete.