Overview
This document describes general integration examples for ThreatSTOP DNS Defense using Response Policy Zones (RPZ) on Nokia’s VitalQIP® DDI product.
The integration is performed with the DNS 6.3 server type and has been tested on Linux-based deployments.
Pre-requisites
- Nokia VQIP instance
- Tested with VQIP version 20.
- DNS 6.3 server configured as a resolver.
- The integration is tested with a VQIP-managed DNS server running on Linux
- Windows-based deployment of the DNS server are untested.
To check that the DNS server is configured as a resolver:
- Open the VQIP Web GUI and browse to DNS > DNS Servers
- Select the DNS Server(s) which will be configured with the ThreatSTOP RPZ zone
- Check the server type (DNS 6.3)
- Check the Allow Recursion setting (Use List)
- Under Allow Recursion > Other, check the list of subnets allowed to use the DNS recursion service.
Connectivity
To retrieve its policy (RPZ Zone), the VQIP DNS Server needs the following connectivity:
- DNS over TCP
- IP Range: 192.124.129.51/32
- Outbound TCP port 53
- NTP
- Outbound UDP port 123
Device Settings
You will need the following settings to complete the installation. You can retrieve the RPZ Zone name, TSIG Key name, TSIG Key secret and Device ID via the settings of the device in the Admin Portal.
| Setting | Value |
|---|---|
| DNS Server IP Address | Zone masters retrieved from device settings |
| Device ID | Retrieved from device settings |
| RPZ Zone Name | Retrieved from device settings |
| TSIG Key Name | Retrieved from device settings |
| TSIG Key Secret | Retrieved from device settings |
Configuration Steps
ThreatSTOP configuration
- Step 1: Create a ThreatSTOP account if you don’t already have one.
- Step 2: Browse to the device page and create a new type
- Type: DNS Firewall
- Vendor: Nokia
- Type: VitalQIP
- Step 3: Enter the device settings
-
Nickname: This is a mnemonic name used to identify the device. It can be set to any string (A-Z, 0-9, - and _). If you create multiple device entries, each entry must have a unique nickname. The Nickname will be used to identify the device on the TSCM and in the Reporting user interface.
-
Policy: Select a pre-defined policy or a customized policy. It must be an DNS Policy type.
-
IP Type: Access to the ThreatSTOP services is controlled in part using an ACL allowing the device IP to connect. If your device has a static public IP address (the most common case), select static. If your device has a dynamic public IP address, the ThreatSTOP services can lookup the IP address using a DNS fully-qualified name (FQDN).
-
Public IP address: In static mode, this is the public IP address of the TSCM. It is possible to configure multiple device entries with the same public IP address.
-
Note: An optional field to store a note of your choice about the device - location, identifiers, model…
-
- Step 4: Save the device configuration. Upon reload, the RPZ zone settings will be available (See the Device Settings section below).
Policies become available 30 minutes after creating a new device in the ThreatSTOP Portal.
Nokia VQIP configuration
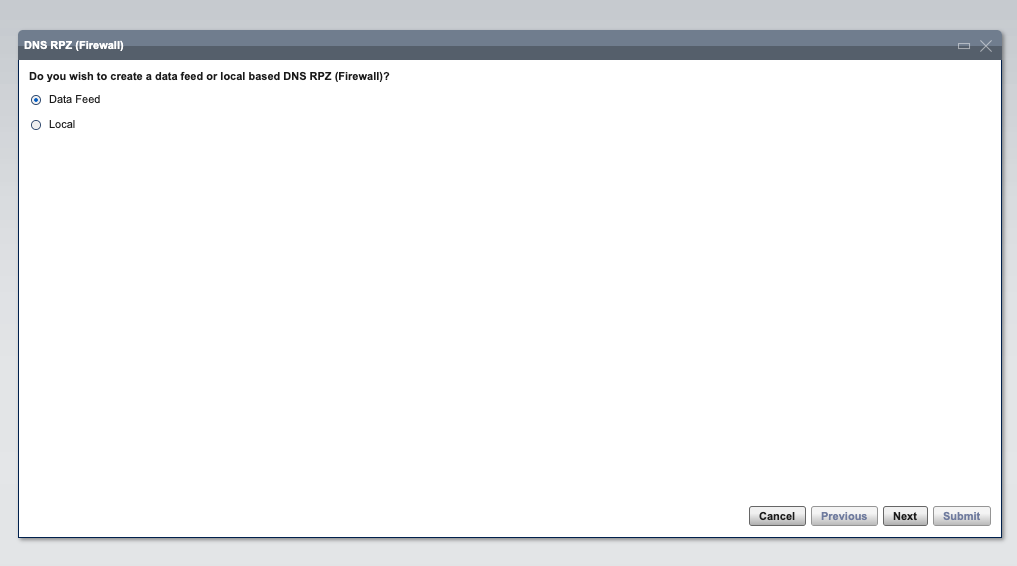
- Login into the VQIP Web GUI and go to the DNS Servers > DNS RPZ (Firewall) menu

- In the first step of RPZ configuration, select Data Feed and click Next.
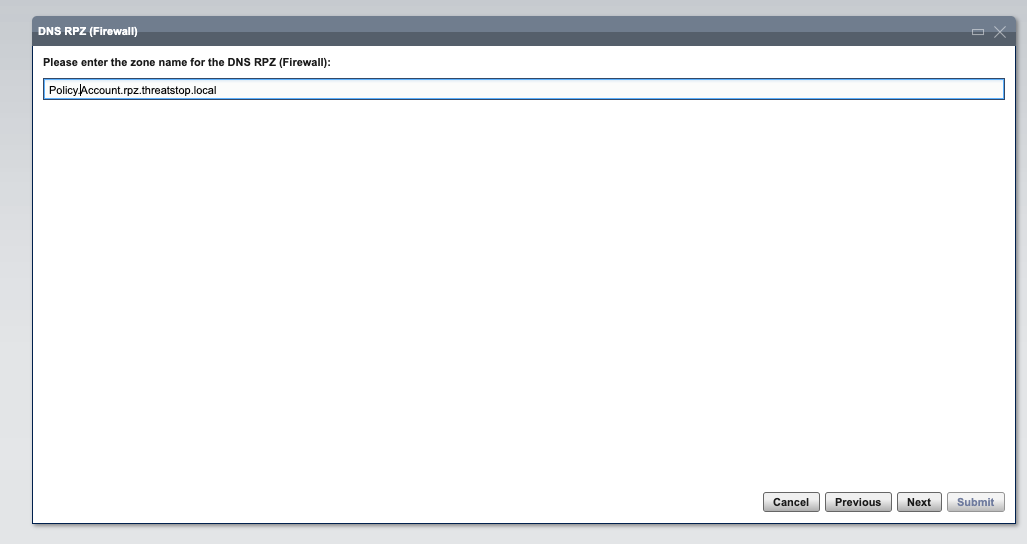
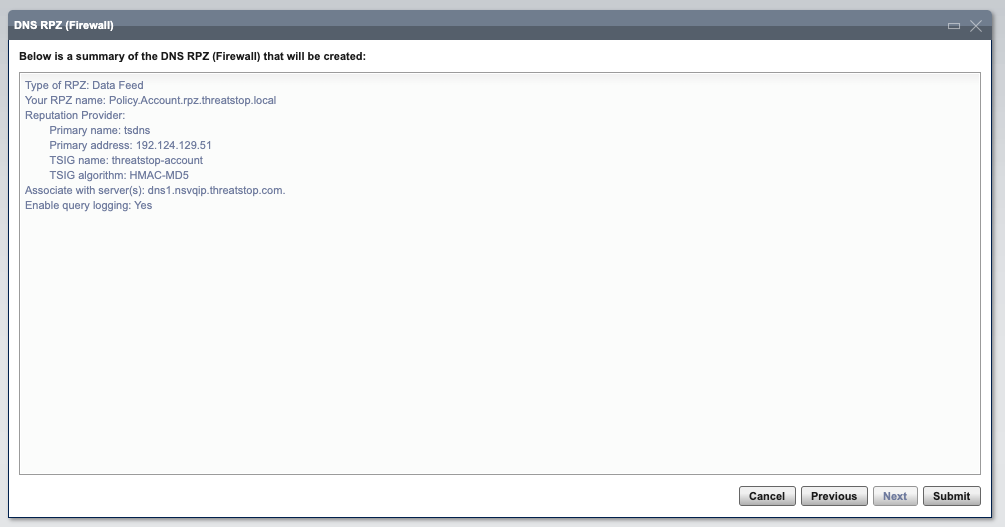
- Enter the name of the ThreatSTOP Zone and click Next.
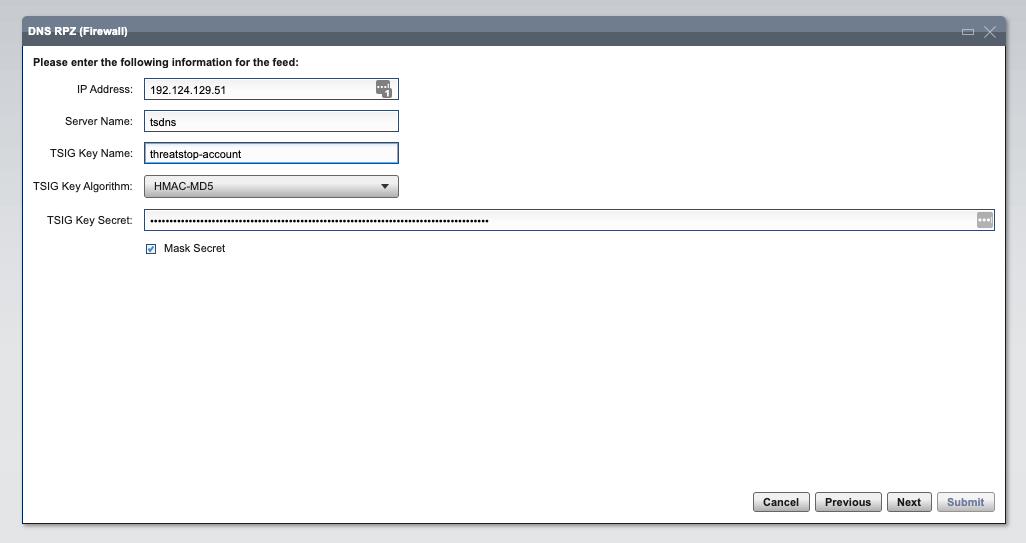
- Enter the name of the following settings for accessing the zone:
- IP Address: Zone master server retrieved from device settings
- Server name: select a name of your choice, e.g. threatstoprpz
- TSIG Key Name: Retrieved from device settings
- TSIG Key Algorithm: HMAC-MD5
- TSIG Key Secret: Retrieved from device settings
- Keep the parameters as Default.

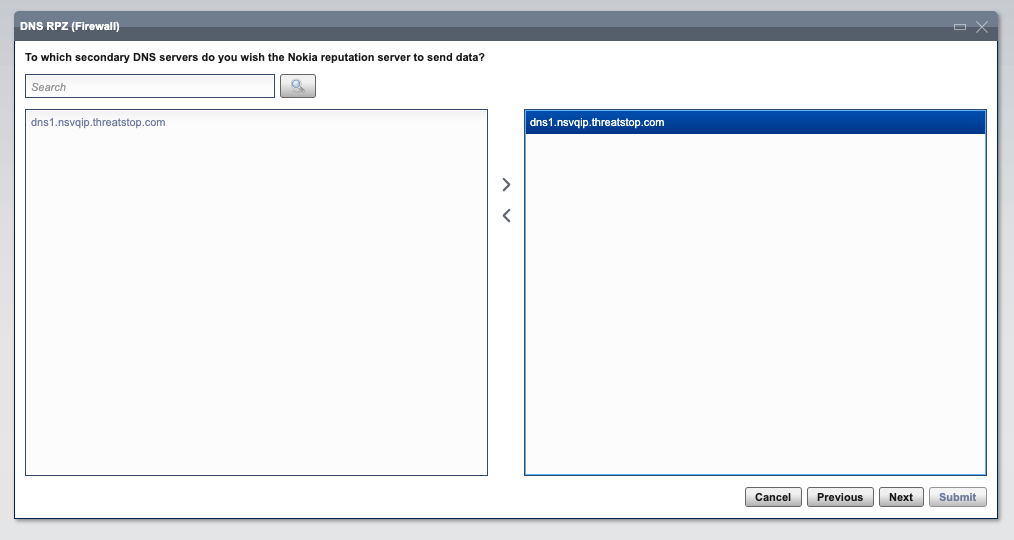
- Search the VQIP DNS Server(s) (existing DNS 6.3 resolvers) that will load the RPZ zone.
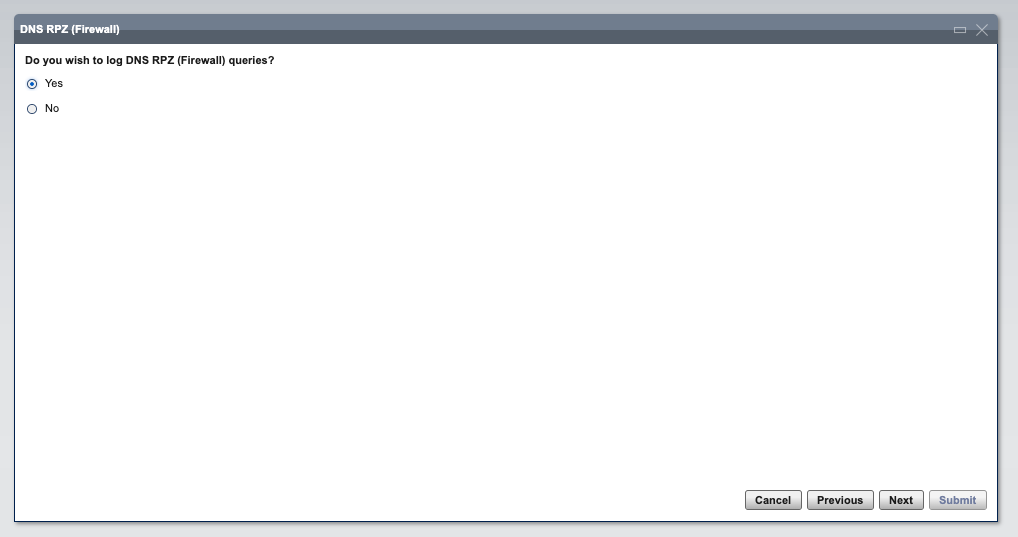
- Enable RPZ Logging. By default, logs will be stored in a file name rpz.log in the directory where the DNS server is installed (e.g. /opt/qip/named)
- Review the configuration and submit. Once the submission completes, the RPZ zone will be loaded.
Checking the configuration
-
After the RPZ zone has been configured, it will be downloaded in a directory named sec_qip located in the DNS server’s directory (e.g. /opt/qip/named/sec_qip/policy.account.rpz.threatstop.local).
-
Perform a test lookup. The DNS server should return NXDOMAIN.
dig @DNS_SERVER_IP bad.threatstop.com
;; ->>HEADER<<- opcode: QUERY, status: NXDOMAIN, id: 54958
;; flags: qr rd ra; QUERY: 1, ANSWER: 0, AUTHORITY: 0, ADDITIONAL: 2

;; OPT PSEUDOSECTION:
; EDNS: version: 0, flags:; udp: 4096
;; QUESTION SECTION:
;bad.threatstop.com.		IN	A
If the DNS server returns an IP address (64.87.3.133), the DNS zone is not applied by the DNS server.
- Check the RPZ log for a hit for bad.threatstop.com
cat /opt/qip/named/rpz.log
25-Oct-2021 20:57:39.735 rpz: info: client @0x7f04040425e0 192.168.1.1#45954 (bad.threatstop.com): rpz QNAME NXDOMAIN rewrite bad.threatstop.com via ...
Updating the VQIP settings
Changing the ThreatSTOP server IP Address
If you need to edit the IP address of the ThreatSTOP DNS server:
- Open the VQIP Web GUI.
- Browse to DNS > Non-Managed DNS Servers.
- In the tree of servers, locate the ThreatSTOP DNS Server.
- Click on the entry (Name and IP address).
- Edit the IP Address and Save.
- Browse to DNS > DNS Servers and locate the DNS Server(s) using the RPZ zone.
- For each server, select the server entry. In the Action Menu, select DNS Generation.
- Set the Scheduler to In Foreground and Submit.
- The new IP address will propagate to the DNS server configuration.
Changing the ThreatSTOP TSIG key
If you need to edit the IP address of the ThreatSTOP DNS server:
- Open the VQIP Web GUI.
- Browse to DNS > TSIG Keys.
- In the list of keys, locate the ThreatSTOP key (threatstop-account).
- Click on the entry.
- Change the setting(s) - name, Algorithm and/or secret.
- Browse to DNS > DNS Servers and locate the DNS Server(s) using the RPZ zone.
- For each server, select the server entry. In the Action Menu, select DNS Generation.
- Set the Scheduler to In Foreground and Submit.
- The new IP address will propagate to the DNS server configuration.
Changing or removing the ThreatSTOP policy (RPZ Zone)
To change the ThreatSTOP policy loaded on the DNS server, we recommend deleting the existing zone and creating a new one by following the initial configuration steps.
To delete the existing policy:
- Open the VQIP Web GUI.
- Browse to DNS > Zones.
- In the list of zones, locate the ThreatSTOP RPZ zone.
- Click on the entry and click delete.
If you want to delete the policy and not replace it with a new one, follow the steps for DNS Generation for each of the servers where the RPZ zone is configured.
History
| October 2021 | Initial documentation of VQIP configuration |