Installing the ThreatSTOP Live ISO
Follow these steps to install and boot the Live ISO after downloading the ISO file.
Before you can proceed, you need to register for a ThreatSTOP account, and create a device via our Web Admin Portal:
- either using the Guided Setup and selecting the Corporate Protection option
- or create a DNS Firewall or IP Firewall device through the Device Management screen
Both options will provide you with a product activation key required to install the ThreatSTOP Live ISO.
Overview
The ThreatSTOP Live ISO is an Ubuntu 16.04 image with:
- a DNS Firewall running ISC’s BIND RPZ
- an IP Firewall using IPTables & IPSet
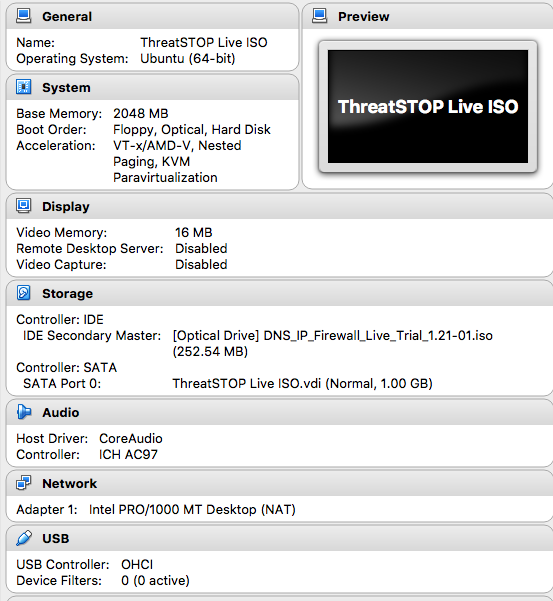
The ThreatSTOP Live ISO image should be configured as the boot device for a virtual machine with
- 1 64-bit CPU
- 2 GB RAM
- a 10 MB dedicated hard drive image
- One network adapter with DHCP access
Below are the instructions for installing on common Hypervisor applications. You can use an Hypervisor running on a laptop or desktop machine, such as VirtualBox, Windows 10 Hyper-V, Fusion and Parallels. You can also use EXSi, Hyper-V Server and Xen.
Please contact us if you need assistance installing the LiveISO on these or other Hypervisors. The image can be downloaded from our FTP site.
Network Connectivity
The virtual machine must be able to retrieve an IP address, default gateway and DNS server address via DHCP. To retrieve its configuration and policy, the machine needs the following connectivity:
- DNS over TCP
- Hostname: ts-dns.threatstop.com
- IP Range: 192.124.129.0/24
- Outbound TCP port 53
- DNS over TLS
- Hostname: ts-ctp.threatstop.com
- IP range: 204.68.97.208/28
- Outbound TCP port 5353
- HTTPS
- Hostname: rest.threatstop.com
- IP range: 204.68.99.208/28
- Outbound TCP port 443
VirtualBox instructions
VirtualBox is an open-source Hypervisor available for Windows and OS X. Using VirtualBox on your workstation to run the ThreatSTOP Live ISO provides a quick way of trying our product.
Alternatives for running a virtual machine on your desktop include Hyper-V on Windows 10 and Fusion or Parallels on OS X. If you want to install VirtualBox, the latest version is available from Oracle at https://www.virtualbox.org/wiki/Downloads To create and configure a Virtual Machine suitable for the Live ISO, follow these steps:
- Download the ThreatSTOP Live ISO image to your workstation
- Start VirtualBox
- Select the Machine > New menu
- On the first screen, use:
- Name: ThreatSTOP Live ISO
- Type: Linux
- Version: Ubuntu (64-bit)
- On the second screen, select 2048 MB of memory
- On the third screen, create a virtual hard disk
- Do not use an existing virtual hard disk file. The hard disk will be erased at boot time.
- On the next screens, select the VDI format, choose a Dynamically Allocated disk and set the disk size to 1 GB
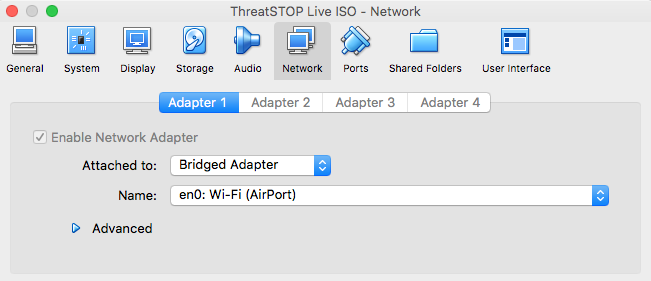
- Right-click on the new virtual machine and edit its settings
- On the network tab, select Bridged Adapter and a network interface that provides DHCP and Internet connectivity
- On the storage tab
- Select the CDRom icon under the IDE controller
- Click on the CDROM icon next to Optical Drive
- Select Choose Virtual Optical Disk File
- Locate the ThreatSTOP Live ISO image
- Enable Live CD/DVD

- Start the virtual machine
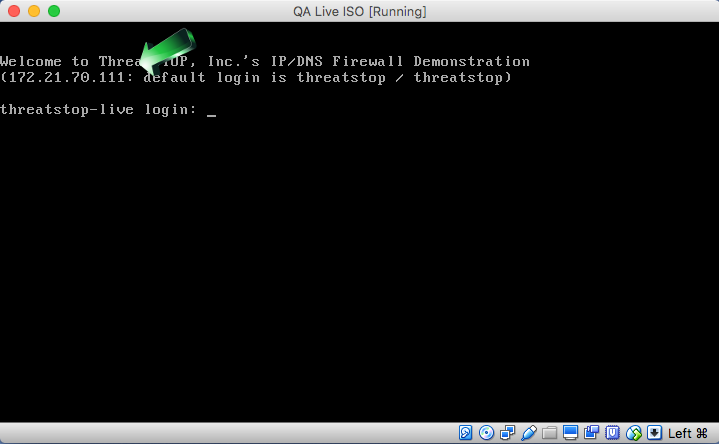
- After the virtual machine completes its boot, its IP address will be displayed in the console
ESXi instructions
These instructions were created for vSphere 5.5.
Step 1 - Upload the ISO image to vSphere
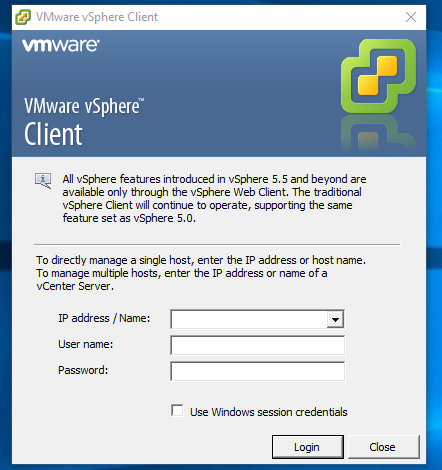
- After downloading the ThreatSTOP Live ISO file to your workstation, start the vSphere client
- Go to the datastore inventory and select a datastore suitable to store the Live ISO image
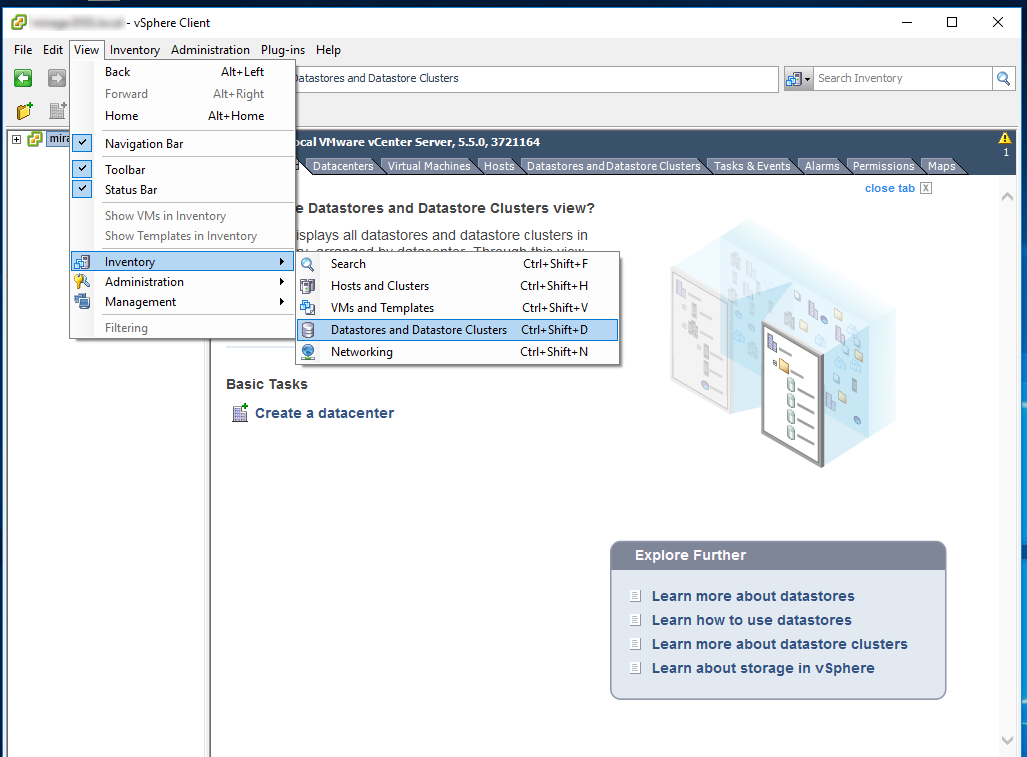
- Browse the datastore and select the Upload File icon
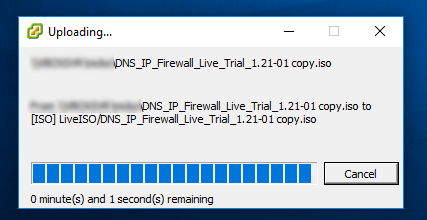
- Locate the ThreatSTOP Live ISO image file and click Open. The ISO will be uploaded to the datastore.
Step 2 - Create a Virtual Machine
- Login into vSphere (with the vSphere Client or Web Interface)
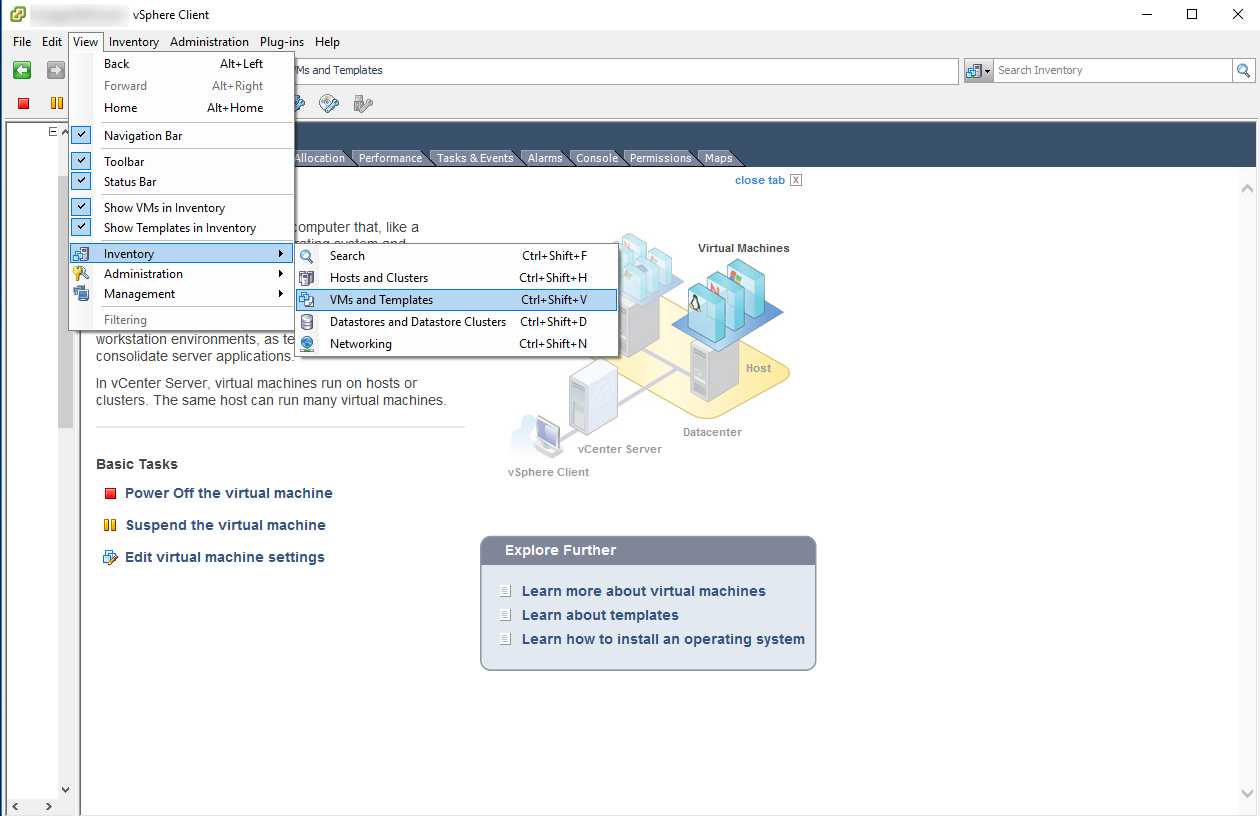
- Browse to the VMs and Templates inventory
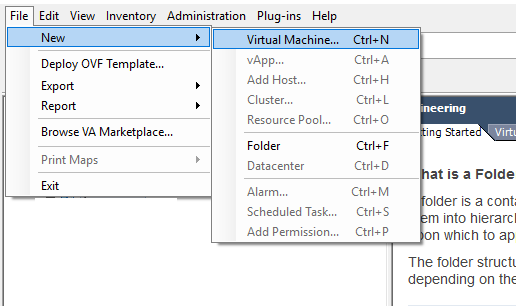
- Start creating a new Virtual Machine
- Select the following settings
- Configuration: Typical
- Name: ThreatSTOP Live ISO
- Host/Cluster: use your preference
- Storage: use your preference
- Guest Operating System: Linux
- Version: Ubuntu Linux (64-bit)
- Use 1 NIC configured with a network with DHCP and access to the Internet
- Connect the NIC at Power on
- Virtual Disk Size: 1 GB
- On the “Ready To Complete” step, select ‘Edit the Virtual Machine settings before completion” and click Continue
- Edit the memory configuration to use 2 GB
- Configure the Virtual Machine to use the Live ISO image to boot
- Select the “New CD/DVD” device
- Click “Connect at Power On”
- Select the “Datastore ISO File” and browse to the ISO uploaded in Step 1
- Click Finish
- Browse to the newly created Virtual Machine and start it (“Power on”)
- Open the console - once the VM has successfully started, its IP address will be shown on the console prompt


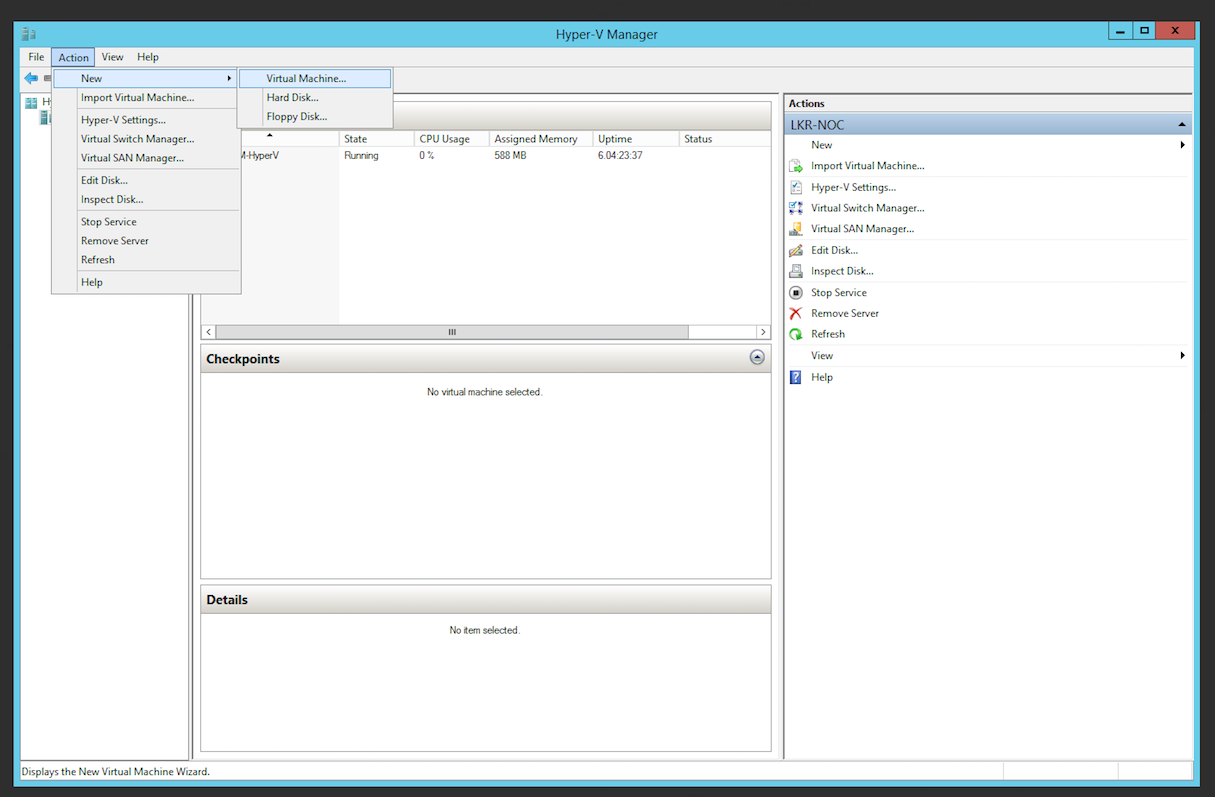
Hyper-V instructions
- After downloading the ThreatSTOP Live ISO file to your workstation, copy it to the Windows system that runs Hyper-V Manager
- Start Hyper-V Manager
- Start the New Virtual Machine wizard by selecting the Action > New > Virtual Machine menu
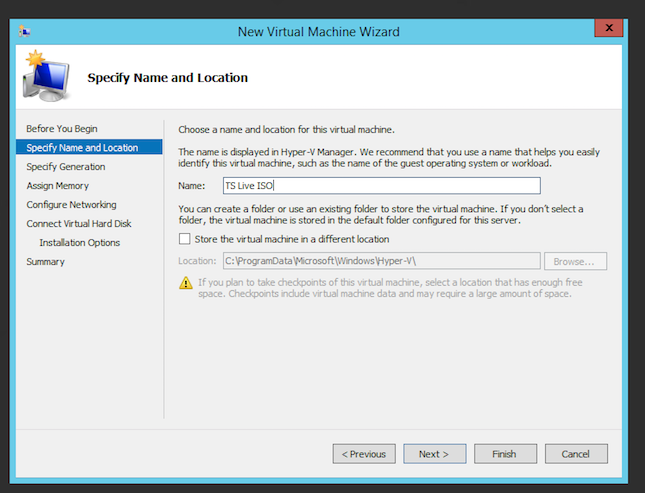
- Select a name for the Live ISO virtual machine
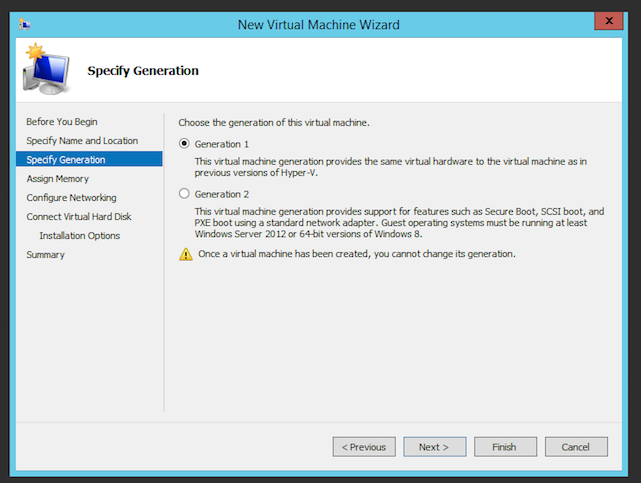
- Choose the generation of the virtual machine. For simplicity, we choose generation 1 but it can run as a generation 2 virtual machine
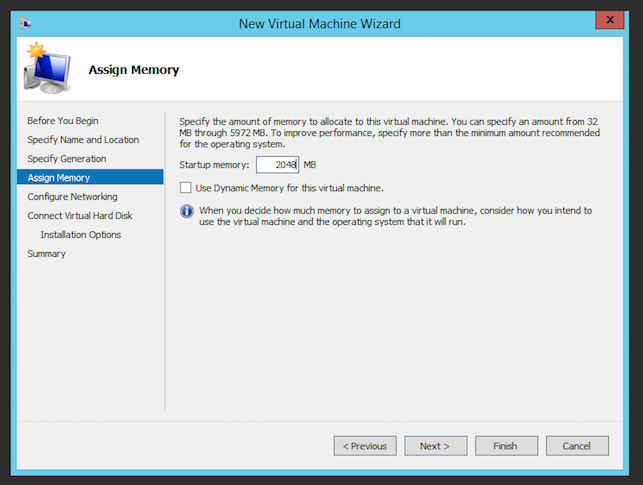
- Assign 2GB of memory
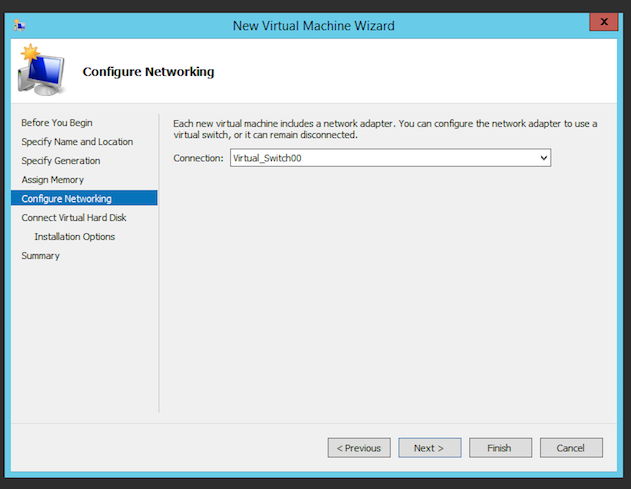
- Add a Virtual Switch to the device that can reach out to the Internet
- Create a 1 GB Virtual Hard Disk. Do not use an existing disk as the disk will be erased during the Live ISO boot.
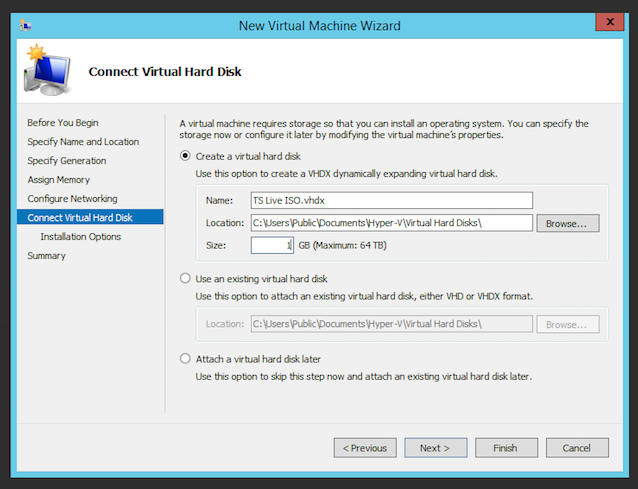
- Select the “Install an operating system from a bootable CD/DVD-ROM” and browse to the Live ISO file

- Complete the Wizard and start the virtual machine
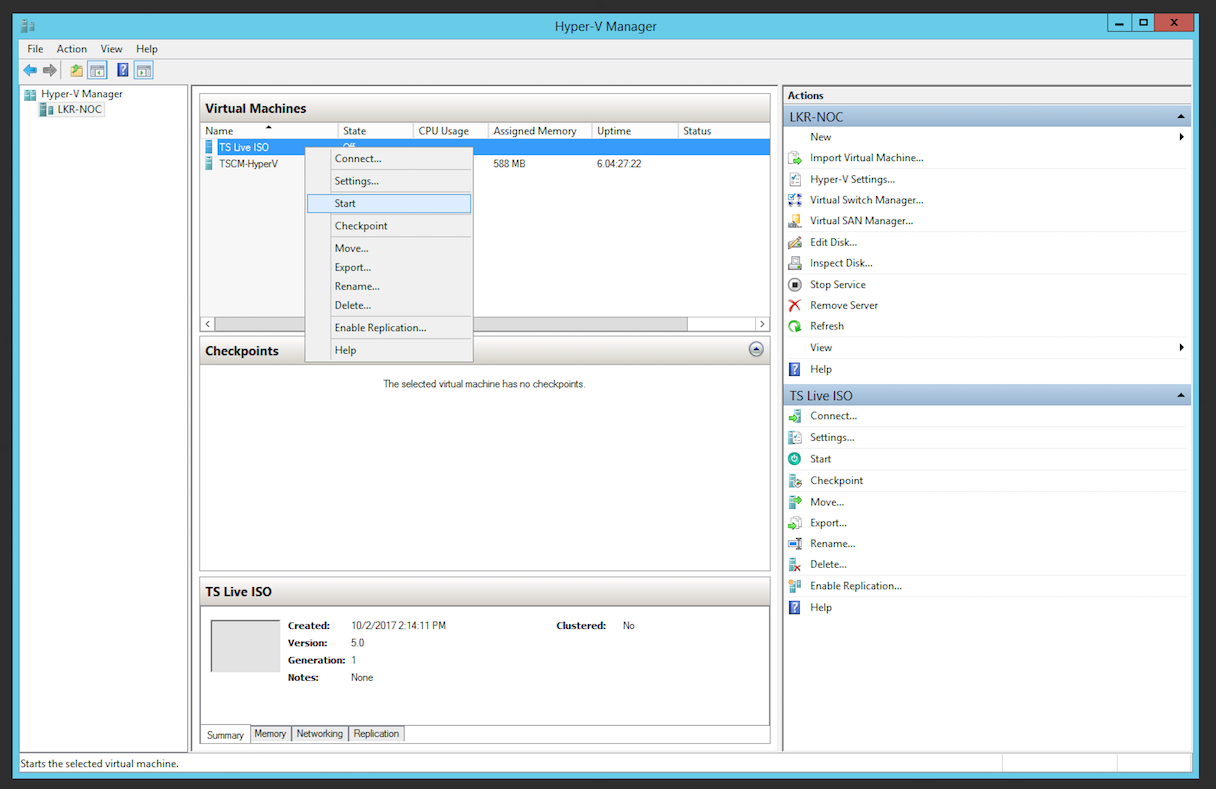
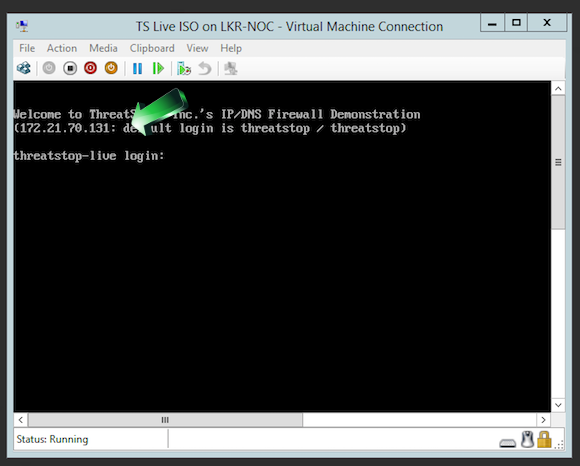
- To retrieve the IP address of the Virtual Machine, connect to it. Once the VM has successfully started, its IP address will be shown on the console prompt.
Using the ThreatSTOP Live ISO
Connecting to the virtual machine
- Connect to the Virtual Machine with an SSH client to perform its configuration. It is easier to copy/paste the product key using SSH.
- The default username/password for the Virtual machine are threatstop/threatstop.
- The IP address can be retrieved from your Hypervisor or from the console of the virtual machine (see installation section above)
Configuration
- Once connected, you will be prompted for the product activation key generated by the Guided setup or device creation form in the Admin Portal. Copy/Paste the key.
- The product activation key will be retained if the virtual machine is rebooted
- You can enable the DNS Firewall or IP Firewall next. Both can be enabled, in any order.
- The System Health check menu will validate connectivity to the configuration, policy and log services used to connect the ThreatSTOP Live ISO to the Web-based Portal.
DNS Firewall
- The DNS Firewall will retrieve its configuration (most significantly, the name of the policy you selected during the device creation) and the policy itself. It will be installed in the DNS server (ISC BIND) within a couple of minutes and refreshed periodically while the virtual machine remains running.
- The policy is ready once the “Policy last updated” menu shows a date and time.
- The “Test/Confirm DNS Firewall” menu will perform a small volume of DNS queries using test domains and IPs in the policy. Select this option to trigger the upload of sample log files in the Web-based reporting.
- Test it yourself:
- From the LiveISO menu, select user shell (item 6) and you will be at a shell prompt
- Use dig or nslookup to lookup known good or bad hosts to verify blocking
- nslookup google.com should return an IP address
- nslookup bad.threatstop.com should not return an IP address
- Edit your workstation’s DNS settings to use the LiveISO IP address as its DNS server
- Browse to google.com – the site should come up
- Browse to bad.threatstop.com – the site should be unreachable
IP Firewall
- The P Firewall will retrieve its configuration (most significantly, the name of the policy you selected during the device creation) and the policy itself. It will be installed in the firewall (Linux Netfilter) within a couple of minutes and refreshed periodically while the virtual machine remains running.
- The policy is ready once the “Policy last updated” menu shows a date and time.
- The “Test/Confirm IP Firewall” menu will perform a small volume of TCP connections using test IPs in the policy. Select this option to trigger the upload of sample log files in the Web-based reporting.
- Test it yourself:
- From the LiveISO menu, select user shell (item 6) and you will be at a shell prompt
- Use ping to test blocking to known good or bad hosts
- ping google.com should show ICMP replies from Google
- ping bad.threatstop.com should not show ICMP replies
- If your workstation is on the same subnet as the LiveISO, edit your workstation’s network settings to use the LiveISO IP address as its default gateway
- Browse to google.com – the site should come up
- Browse to bad.threatstop.com – the site should be unreachable
Live ISO Reboots
The Live ISO will work without a disk attached. In that configuration, its settings are not persistent and rebooting the VM will require reinstalling its key file.
If you attach a disk to the VM, the Live ISO will persist the key file and reinstall a policy after being rebooted. Once the boot sequence is complete, the IP routing and DNS services will be available (albeit with filtering) and the system will start downloading a policy. Depending on your connectivity, this might take a couple of minutes.