Overview
This document describes general integration examples for ThreatSTOP DNS Defense using Response Policy Zones (RPZ) on F5®’s BIG IP/IQ® devices. Since there are so many different network topology setups using this device we will focus in on just a couple common integration methods.
Compatibility
Connectivity
| Service | Port | Direction | IP Address/CIDR Range | Protocol | Notes |
|---|---|---|---|---|---|
| DNS | 53/5353 | Outbound | 192.124.129.0/24 | UDP & TCP | We accept DNS requests via standard port 53, but also support port 5353 as an alternative |
| DNS notifications | 53 | Inbound | 192.124.129.0/24 | UDP | *optional Used for DNS notify for faster policy updates (see doc for more details) |
Supported Devices
| Device | Validated |
|---|---|
| F5® Big-IP/IQ® | 2020 † |
† F5® runs the local BIND server with one CPU. Please test performance if you intend to serve more than a few hundred clients.
Quick Settings
Use the settings below for configuring the ThreatSTOP Response Policy Zone policy on your F5® device.
| Setting | Value |
|---|---|
| Zone Name | * Settings shown when accessing through Devices > Docs |
| Zone Type | Slave |
| Device ID | * Settings shown when accessing through Devices > Docs |
| Master Zone IP Address | Zone masters retrieved from device settings |
| Zone TSIG Key Name | * Settings shown when accessing through Devices > Docs |
| Zone TSIG Key Secret | * Settings shown when accessing through Devices > Docs |
| Notify IP Address | 192.124.129.0/24 (allows faster policy updates) |
Install Methods
- The first, and simplest method, involves setting up the Response Policy Zones via F5® DNS Cache. There are a few limitations with this method as it’s not a true full implementation of the Response Policy Zone Spec. Some major points here are you override all policy actions with one of two provided by F5® (walled garden, nxdomain) regardless of what the policy says the action should be.
- The second integration method, which this document covers, involves using the local BIND server to implement Response Policy Zones via Zone Runner™. This method is a bit more complex to setup, but utilizes BIND full implementation of RPZ. There may be a performance hit using this method since the BIND instance is run with a single CPU, however you can optionally apply a transparent cache to enhance performance. Optional logging is available with this method.
- The third option we’ll briefly touch on now when scalability is a concern is simply provisioning multiple BIND DNS Server instances and forwarding requests through them which allows caching responses natively in F5. If you are unfamiliar with setting up a BIND server but want to take advantage, we do offer an easy web based configurable BIND option via our TSCM Appliance. Logging & reporting is available with this option as well, if desired.
Response Policy Zones via BIND / Zone Runner ™
This method uses Big-IP/IQ®’s built in BIND Server to handle the full blown implementation of RPZ. We will configure it as a transparent cache and forward requests to 9.9.9.9 in our example *optional steps.
ThreatSTOP Portal setup
The following steps will be performed on the ThreatSTOP admin device portal.
Step 1 - Add & configure F5® device
- If you want to use a custom DNS Firewall policy, please read DNS Firewall Policies
- Create a new Device Entry: Click on Devices and then on Add Device.
- The Manufacturer is: F5
- The Model is: Big-IP/IQ®
- Select the DNS Firewall policy - either a pre-defined policy or a custom policy
F5® Device setup
The following steps will be performed on the F5® device.
Step 2 - Setup Zone Runner ™ / BIND Configuration

Setup Zone
- In the ‘DNS’ section on the menu navigate to > Zones > ZoneRunner > Zone List (+)
- Click [Create] and enter in the values below
| Setting | Value |
|---|---|
| View Name | DNSFW Protected |
| Zone Name | * Settings shown when accessing through Devices > Docs |
| Zone Type | Slave |
| Zone File Name | <filled in automatically> |
| Options | * see codeblock below |
masters {
    192.124.129.51 port 53 key threatstop-keyname;
};- Hit [Finished] to save
Setup View
- In the ‘DNS’ section on the menu navigate to > Zones > ZoneRunner > View List (+)
- Here you will want to partition based on network topology who can access the DNS Defense server to reduce your attack surface.
- If this is an internal only server set the
anykeyword in the view to match all clients, otherwise create multiple views per network segment. Common examples are “external” and “internal” which may be protected. -
Hit Add Zone or Update to save.
- More information about BIND Views here
Setup Named configuration
Below is an example of an RPZ BIND configuration. You will want to customize the allowed_to_query ACL and view match ACL to limit who can access the DNS Defense server.
- If you don’t want the BIND server to do recursion set
recursion no; - You can specify multiple DNS Server IP Addresses separated by semi-colons in the
forwarderssection. In the example below we set it to9.9.9.9;but you can set it to whatever you wish. - If you wish BIND to forward any queries it can’t serve locally add
forward only;just under theforwarderssection.
match-clients ACL and the allowed_to_query ACL.#restrict rndc access to local machines
#use the key in the default place: /config/rndc.key
controls {
inet 127.0.0.1 port 953 allow {
127.0.0.1;
};
};
key threatstop-keyname {
algorithm hmac-md5;
secret "SecretKeyGoesHere==";
};
logging {
channel logfile {
syslog daemon;
severity error;
print-category yes;
print-severity yes;
print-time yes;
};
category default {
logfile;
};
category config {
logfile;
};
category notify {
logfile;
};
channel tslog {
file "/var/log/tdid_abcd1234.log" versions 20 size 1m;
severity info;
print-time yes;
print-category yes;
print-severity yes;
};
category rpz { tslog; };
};
options {
listen-on port 53 {
127.0.0.1;
"zrd-acl-000-001";
};
listen-on-v6 port 53 {
::1;
};
allow-query {
allowed_to_query;
};
recursion yes;
directory "/config/namedb";
allow-transfer {
localhost;
};
check-names master warn;
check-integrity yes;
max-journal-size 1M;
version "none";
masterfile-format text;
forwarders {
9.9.9.9;
};
response-policy {
zone "Basic-DNSFW.rpz.threatstop.local";
};
};
acl "zrd-acl-000-001" {
127.10.0.1;
};
acl "allowed_to_query" {
127.0.0.1;
localhost;
localnets;
// any;
};
server 8.8.8.8 {
};Step 3 - Setup Transparent Cache
While this step is not required, it does provide a significant performance boost.
- In the ‘DNS’ section on the menu navigate to > Caches > Cache List (+)
- Click [Create] and set the cache Resolver Type to
Transparentand hit [Update] to save. We will not setup any additional details on this cache as it just caches responses from the BIND server.
Step 4 - Setup DNS Profile
- In the ‘DNS’ section on the menu navigate to > Delivery > Profiles > DNS (+)
- Click [Create] and set DNS Cache > Enabled, DNS Cache Name > the cache setup on the previous step.
- You will want to set the parent profile to
dns. - Adjust all other settings to your environments needs but do not turn on any Recursion options and hit [Finished] to save.
Step 5 - Setup DNS listener
- In the ‘DNS’ section on the menu navigate to > Delivery > Listeners > Listener List (+)
- Click [Create] and setup a DNS listener as shown in the guide
- Make sure to select the DNS Profile we created in the previous step.
- Hit [Finished] to save
Your F5® Big-IP/IQ® should now be forwarding requests to the internal BIND server and caching results (if transparent caching was setup).
Step 6 - Setup logupload
This step is optional, but keep in mind you will not be able to run reports or setup alerts if you do not setup logging.
The logging and log rotation is handled by BIND natively in the “tslog” directive shown in Step 2. The log uploading can be setup by running the script below.
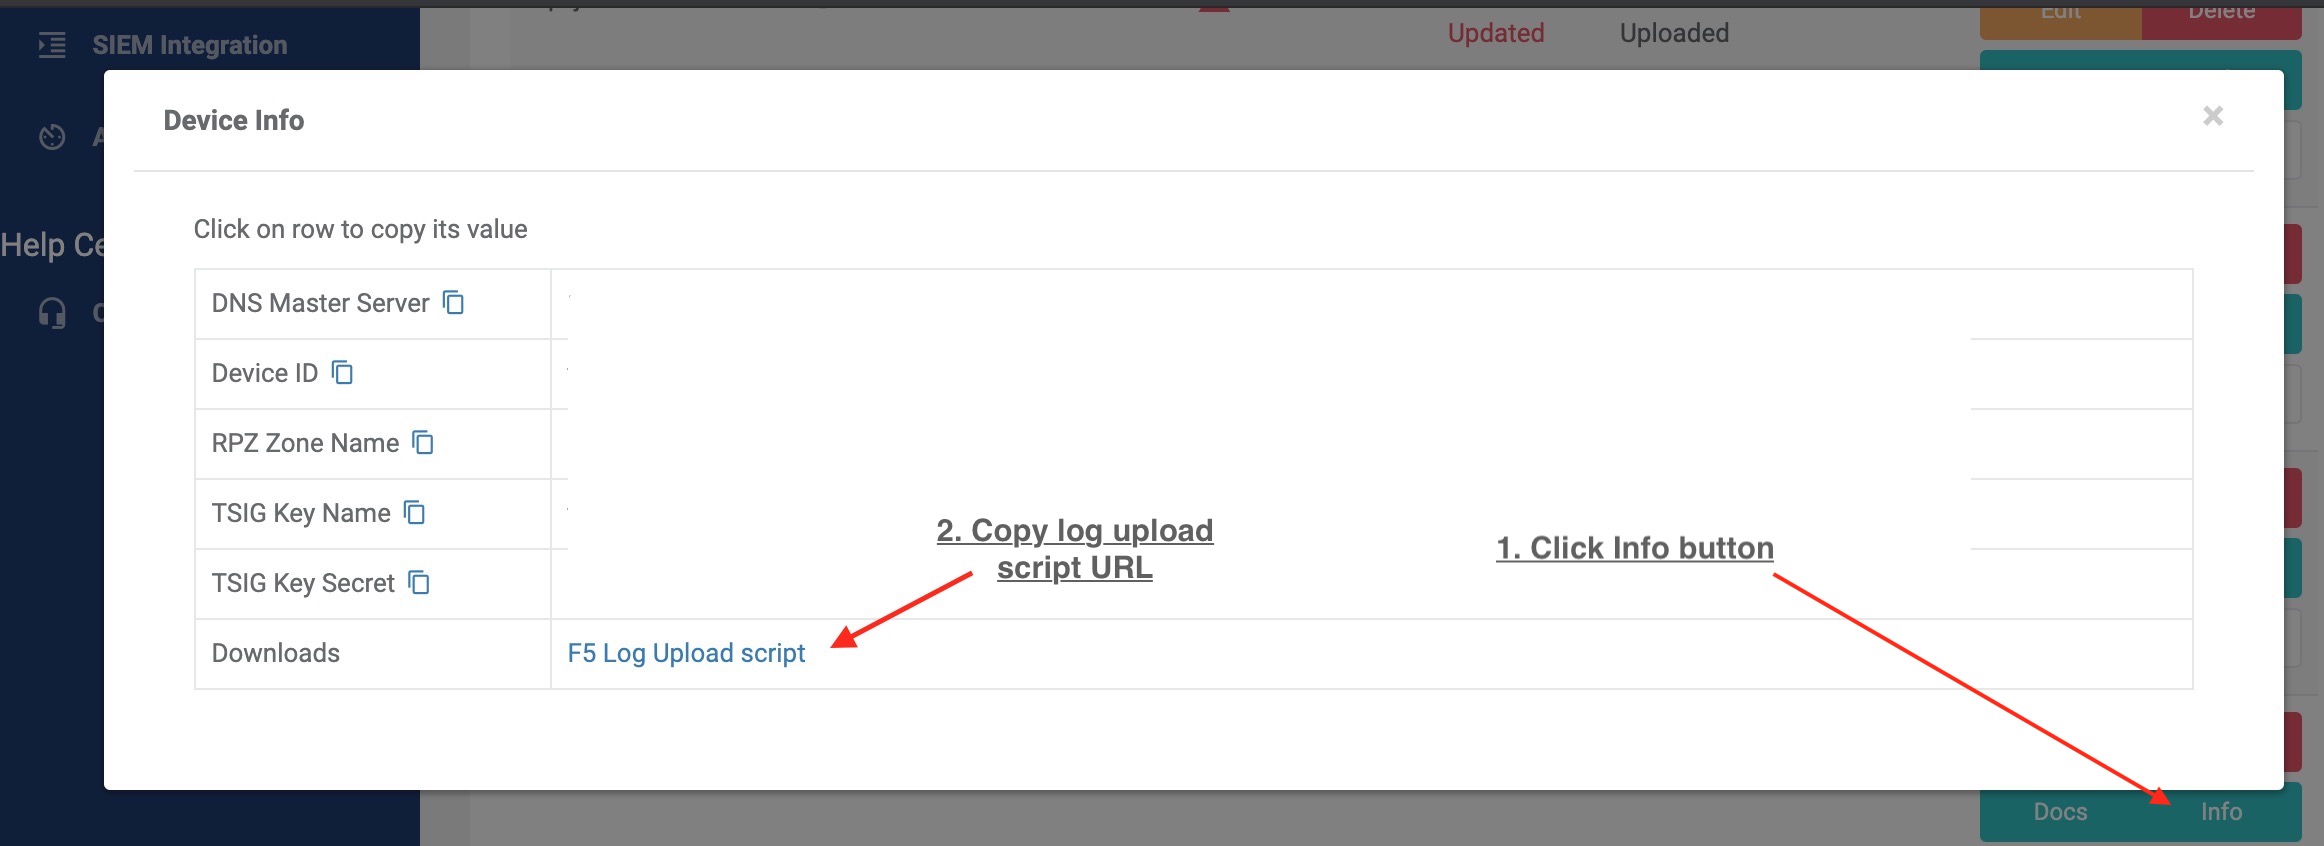
- Download the
ts-logupload.shscript hosted on the admin portal devices page, and review it. You may have to go to the admin/devices section and click the [info] button listed on your device entry to see the download link. - Copy it to the server to the server as
ts-logupload.sh. - Change the mode to grant execution bit
chmod 554 ts-logupload.sh. - Login to the F5® device as a local admin & run
ts-logupload.sh installto have it schedule itself to run automatically. You will have to confirm or provide the full path to the BIND log file.
Below is a one-liner to run on the F5® device once you’ve reviewed it.
scp ./ts-logupload.sh admin_user@f5hostname && chmod 554 ts-logupload.sh && ./ts-logupload.sh install
Step 7 - Test configuration
To verify the installation was successful, we must test it. Point any client with access to the newly created DNS listener and try resolving a few addresses.
We will show some example commands using the dig utility, but can be easily adapted for nslookup. See more from F5® here
- Test
dig @<IP Address of DNS Listener> ts-dns.threatstop.com, which should succeed and return the IP Address. - Test
dig @<IP Address of DNS Listener> bad.threatstop.com, which should return whatever action you setup (walled garden or NXDOMAIN). -
Test
dig @<IP Address of DNS Listener> passthru.threatstop.com, which should return RPZ Pass through. Useful in instances like WannaCry Ransomware killswitch. - Check that the logs from the three events above made it into the BIND log. The location will differ on your device, but should be located by running
find /var/named -type f -name "tdid*.log". Go ahead andtail /var/named/.../tdid..logto check that we see the events.
Next you’ll want to verify a client outside of the listeners network is not reproduce similar results.