Image formats
This page documents the steps to deploy the TSCM virtual machine. The requirements for the virtual machine are documented here and the command line tool (tsadmin) is documented here. Please refer to the documentation of your device for TSCM usage instructions.
The virtual machine is available in the following flavors:
| Devices | Operating Systems | Image Formats |
|---|---|---|
| Cisco, Palo Alto Networks, Check Point, Fortinet, BIND | Ubuntu 24.04 | OVA, VHD |
| A10 vThunder ADC/TPS | Ubuntu 24.04 | OVA |
| A10 vThunder ADC/TPS | Ubuntu 24.04, CentOS 9, RHEL 9 | OVA |
The OVA image is tested with the ESXi and VirtualBox hypervisors. The VHD image is tested with Windows 10 Hyper-V.
If you would like to use these images on a different OS or hypervisor, please reach our customer support team.
Installation
ESXi
To create a TSCM Virtual machine on ESXi using vSphere, follow this VMWare documentation for version 6.x or version 5.x
The OVA is configured with the correct number of CPUs (2), RAM (2GB) and disk space (20GB) to support the integration with multiple devices.
VirtualBox
The VirtualBox installation is simple:
- Install VirtualBox on your Windows PC or OS X Mac.
- Download the OVA image.
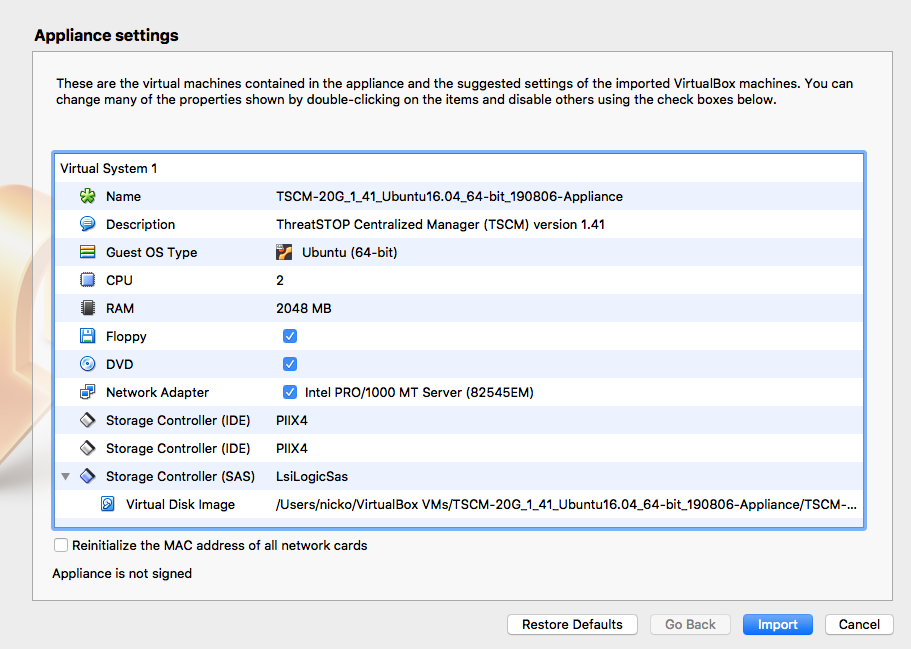
- Double-click the OVA file. This will start VirtualBox and open an Import Appliance window.
- The default system settings should work for all systems.
- Click Import.
- Start the Virtual Machine.
Hyper-V Generation 1 VHD
The VHD image is a Generation 1 disk image. It is not compatible with Generation 2 virtual machines. Please note that Hyper-V’s Quick Create always creates a Generation 2 VM and can’t be use to create the TSCM VM.
To create a TSCM virtual machine:
- Download and uncompress the VHD file (compressed with gzip).
- Start the Hyper-V Manager.
- Select New > Virtual Machine to start with wizard.
- Enter a name and location of your choosing.
- Specify Generation 1 (required).
- Set the memory size. Use 2GB for all devices except A10 vThunder, which requires 10 GB.
- Select a network (e.g. Default Switch). The TSCM requires a single network interface with connectivity to the Internet.
- On the Connect Virtual Hard Disk screen, select Use an existing virtual hard disk and browse to the uncompressed VHD image file.
- Click Finish.
- Edit the settings of the new VM to set the number of Virtual Processors to 2.
- The Virtual machine is ready to be started.
Hyper-V Generation 2 VHDX
Available upon request, please contact support.
Current version SHA256 checksum: f8e51f9a4dc88ab994a365d50b91f35f08b541dc7e1f07f7519670c68cee3fde
To create a TSCM virtual machine:
- Download and uncompress the VHD file (compressed with gzip).
- Start the Hyper-V Manager.
- Select New > Virtual Machine to start with wizard.
- Enter a name and location of your choosing.
- Specify Generation 2 (required).
- Set the memory size. Use 2GB for all devices except A10 vThunder, which requires 10 GB.
- Select a network (e.g. Default Switch). The TSCM requires a single network interface with connectivity to the Internet.
- On the Connect Virtual Hard Disk screen, select Use an existing virtual hard disk v2 (vhdx) and browse to the uncompressed VHDX image file.
- Click Finish.
- Edit the settings of the new VM to set the number of Virtual Processors to 2.
- Turn off secure boot in the Security subsection.
- The Virtual machine is ready to be started.
